Part 1: Drawing
Prototyping with Fab
This part of the course is an individual work, you can help each other but you cannot work together on the same project or deliver similar work.
You have until to complete and submit your documentation in the Share your project page.
Now that we have made our PoC, we will use it to make drawings of what could be the more advanced version of our prototype.
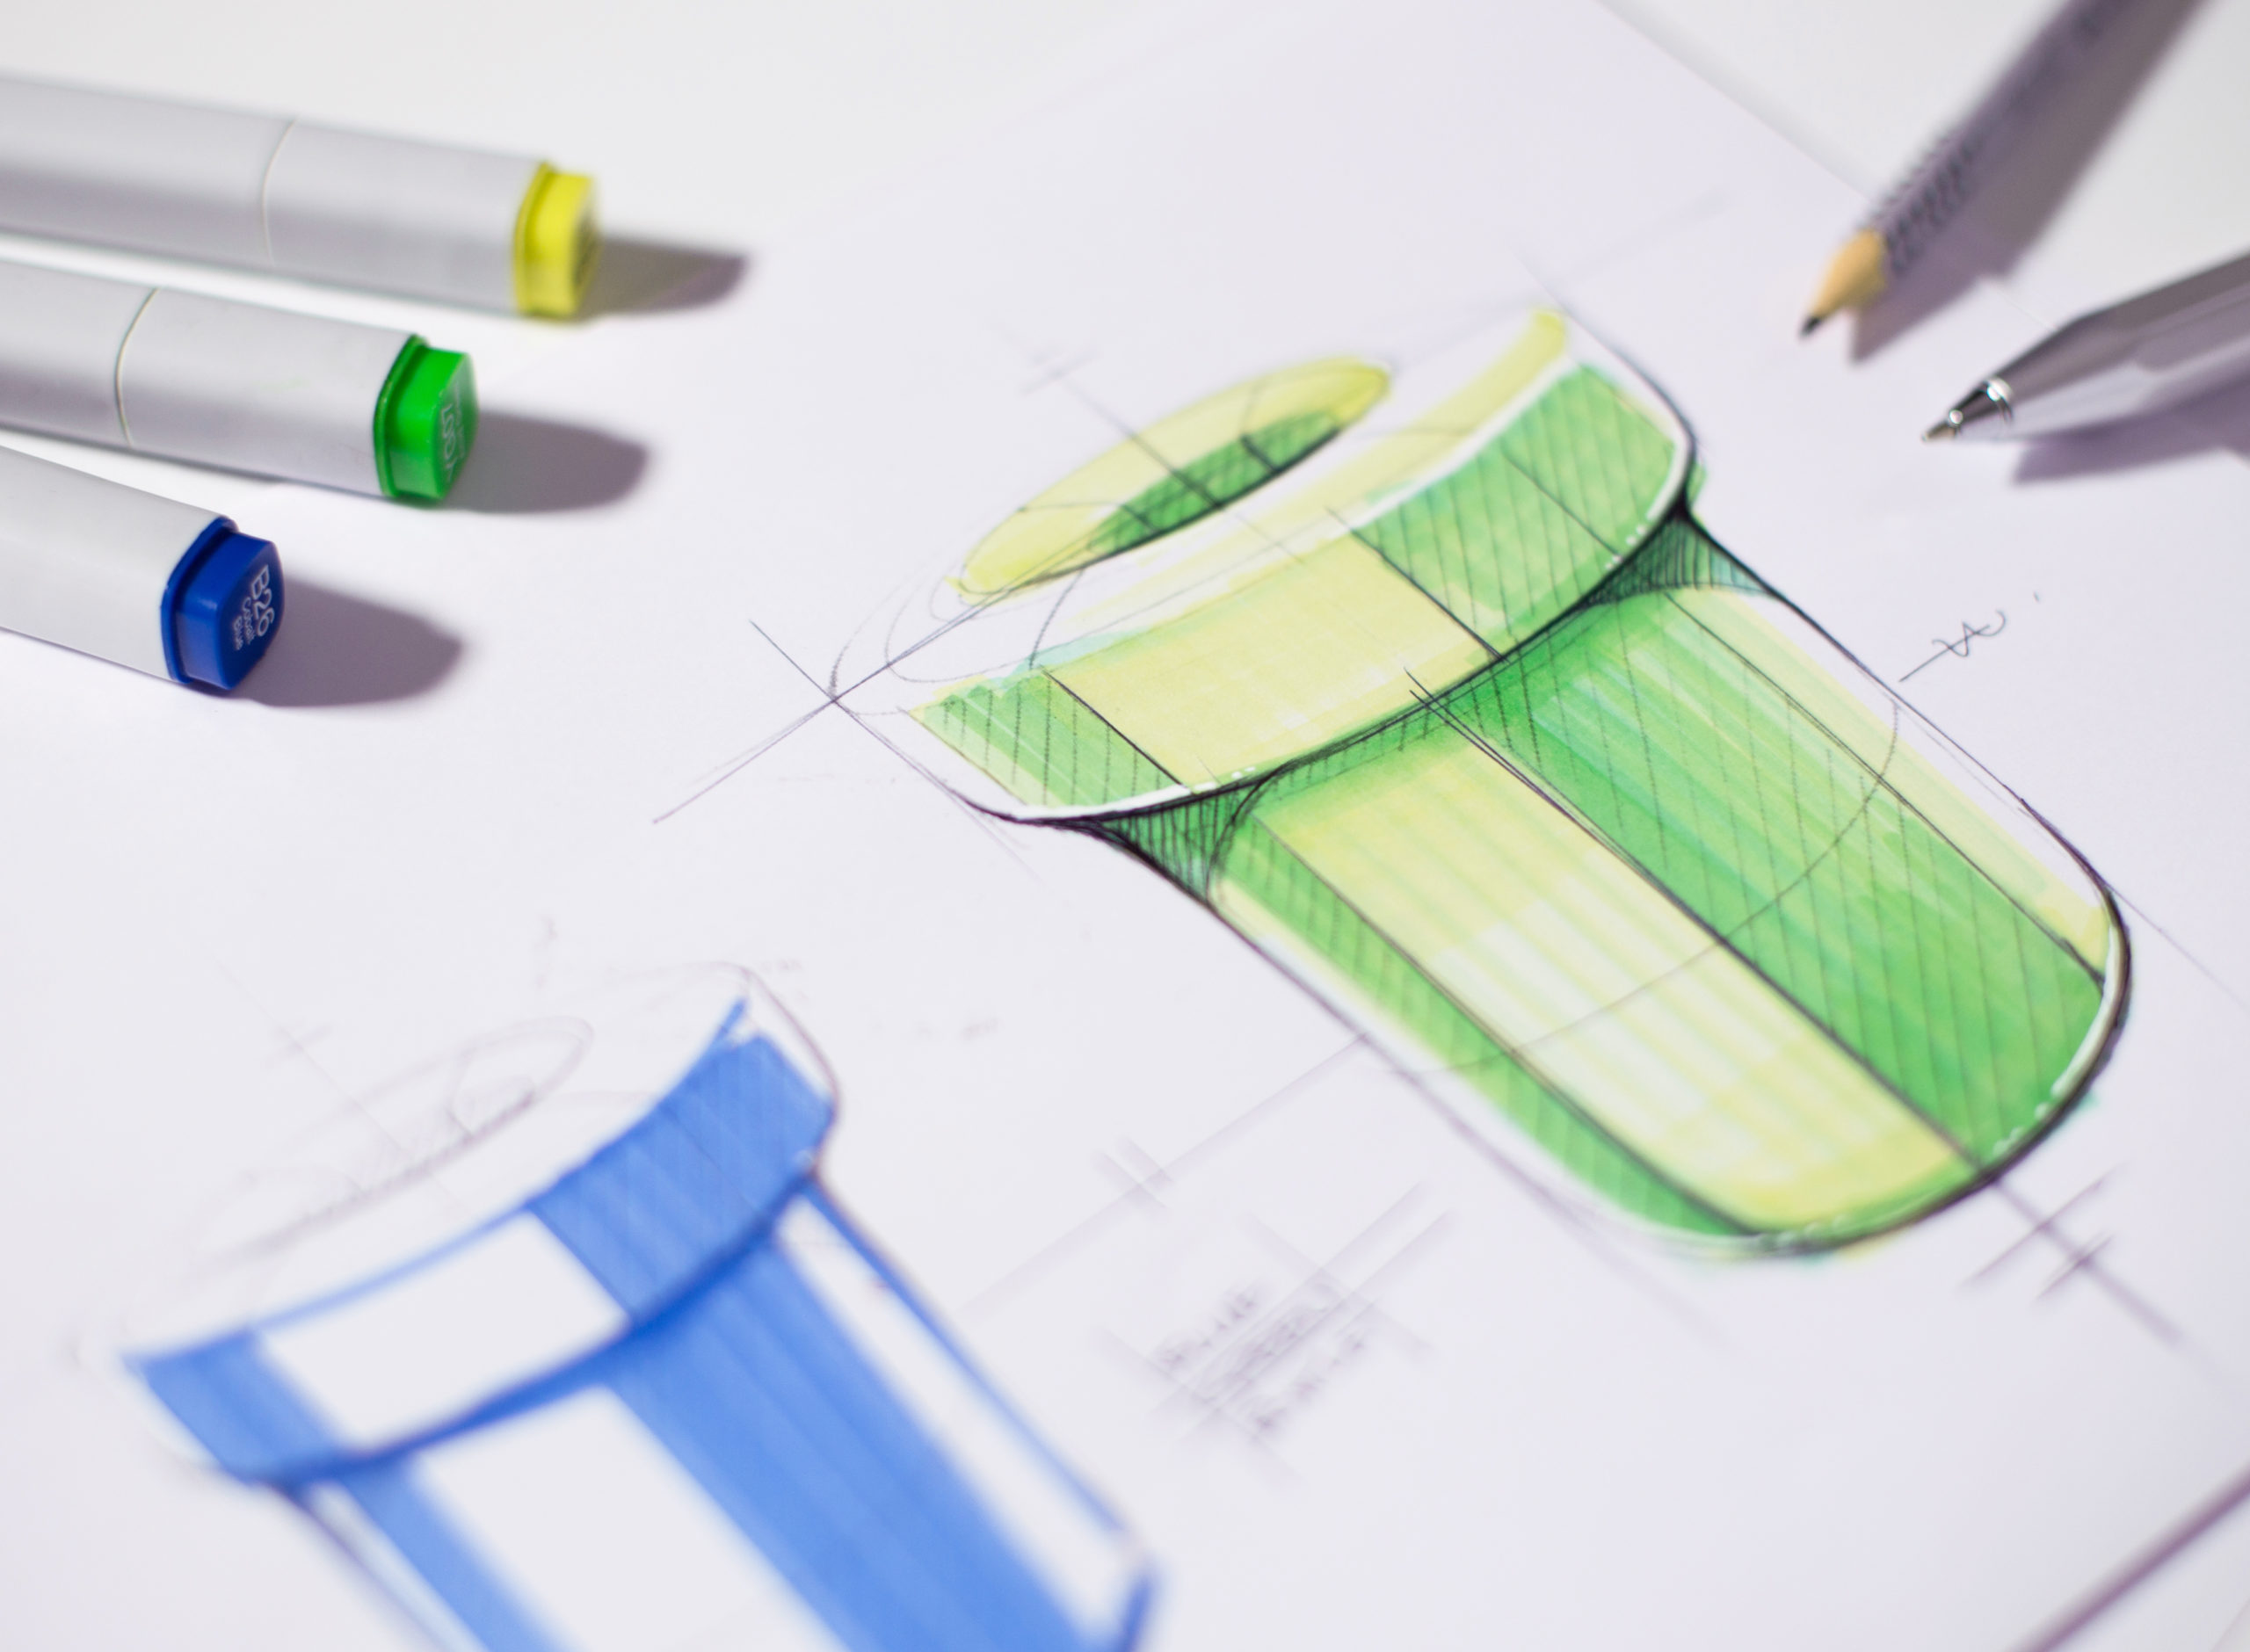
Source: Marius Kindler
Knowing how to draw an object precisely is very important when it comes to prototyping. Drawings are reference elements for the design and manufacture of the object: you don't need to be an artist to be understood, the key is to think about the elements to be communicated and to be as clear as possible.

Why make a model first and then draw in a second time?
By first assembling various elements our object is built without precise planning, we interact with it and transform it very quickly as it is built: this allows us to be more creative and flexible. Confronting our ideas directly with reality allows manipulations and experiments that would have been impossible with drawings alone. However, if we wish to manufacture a more accomplished version of our object, the drawing becomes a precious ally because it allows us to represent it and to plan its construction.
We will use these drawings in the next steps of the project to design your prototype in 2D and 3D.
For this exercise, let's imagine that we are a designer who gives his plans to a third person who must make the prototype. Imagine that this person should be able to make your prototype with only your drawings as a reference.
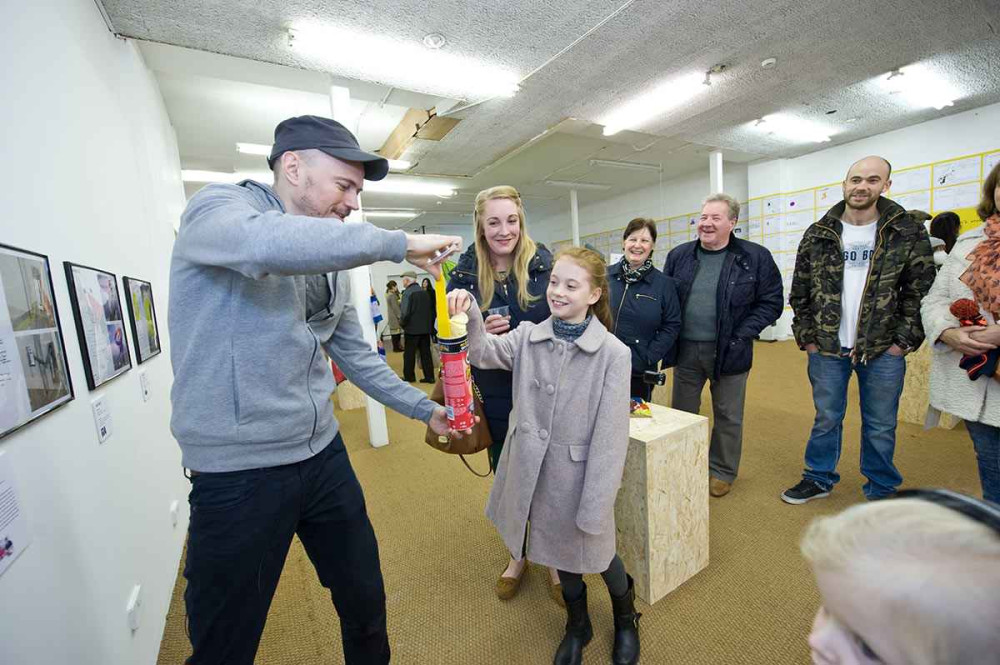
In the example below Dominic Wilcox, British designer, creates prototypes of inventions that children send him in the form of drawings. The proof that everyone can take part in the exercise!
Source: littleinventors
Source: littleinventors
Source: littleinventors
Tools
Make yourself comfortable at your desk and take the following tools:
- A sharp pencil
- An eraser
- A ruler
- Several sheets of paper

Draw
Referring to our PoC we will draw the ideal version of our prototype freehand. At this stage it is not important to respect scales or proportions but the drawing should be large enough, it is better to use a whole sheet of paper. The orientation of the page (portrait or landscape) depends on the shape of the object.

We need to adapt the drawings to our vision of what the ideal prototype could be. The PoC will be used as a reference to define the volumes, the location of the different functions and the construction. So don't reproduce your PoC "as is" but represent an improved version.
To ease the reading, it may be useful to separate the prototype into several drawings.
Views
It is not necessary to show several views of the object if one is sufficiently meaningful. However, additional views can be added to help understand the construction of the prototype, for example if the object unfolds and folds or if you want to show a particular element.
If there are details that are too small to be adequately represented on the main sketch it may be necessary to make a larger scale view of a part of the prototype. Also, sectional views that show the interior of the object in a certain plane may be necessary.
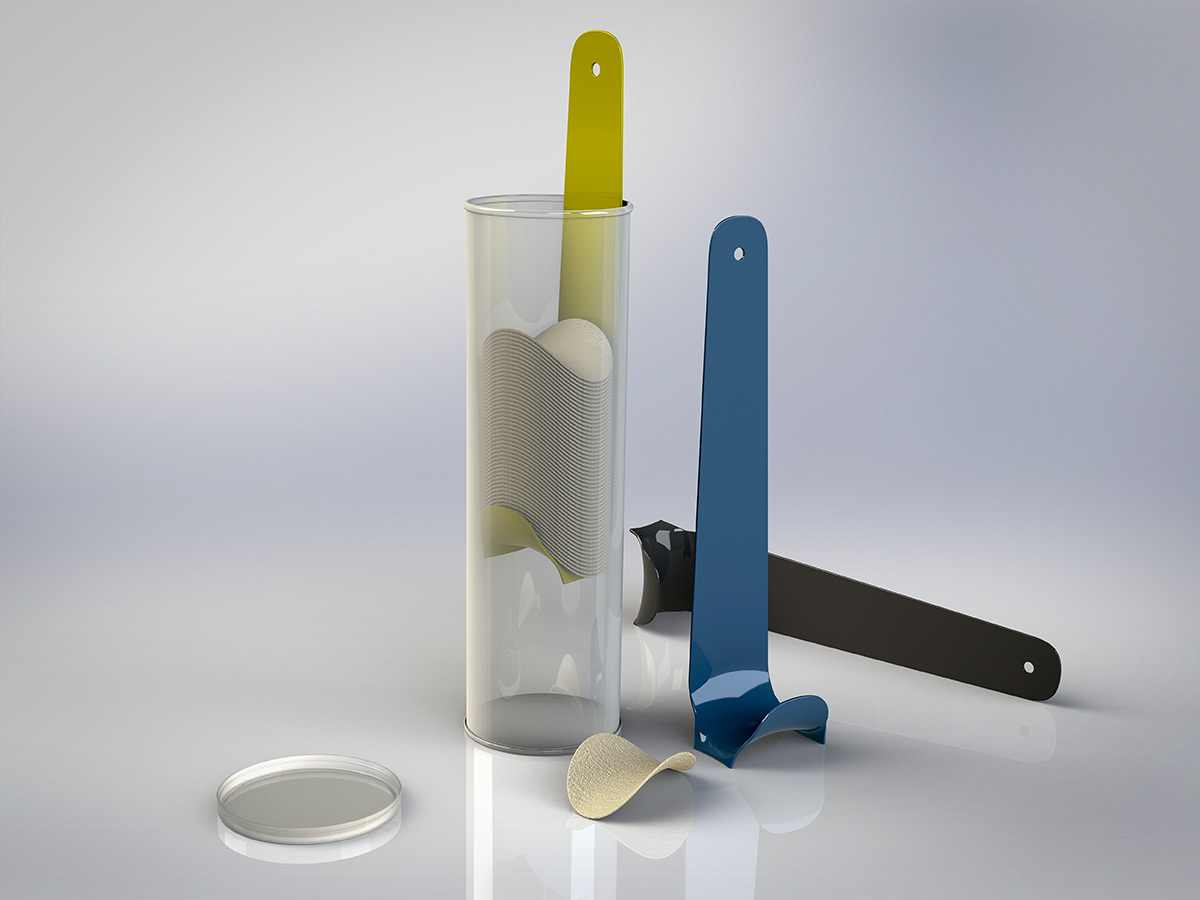
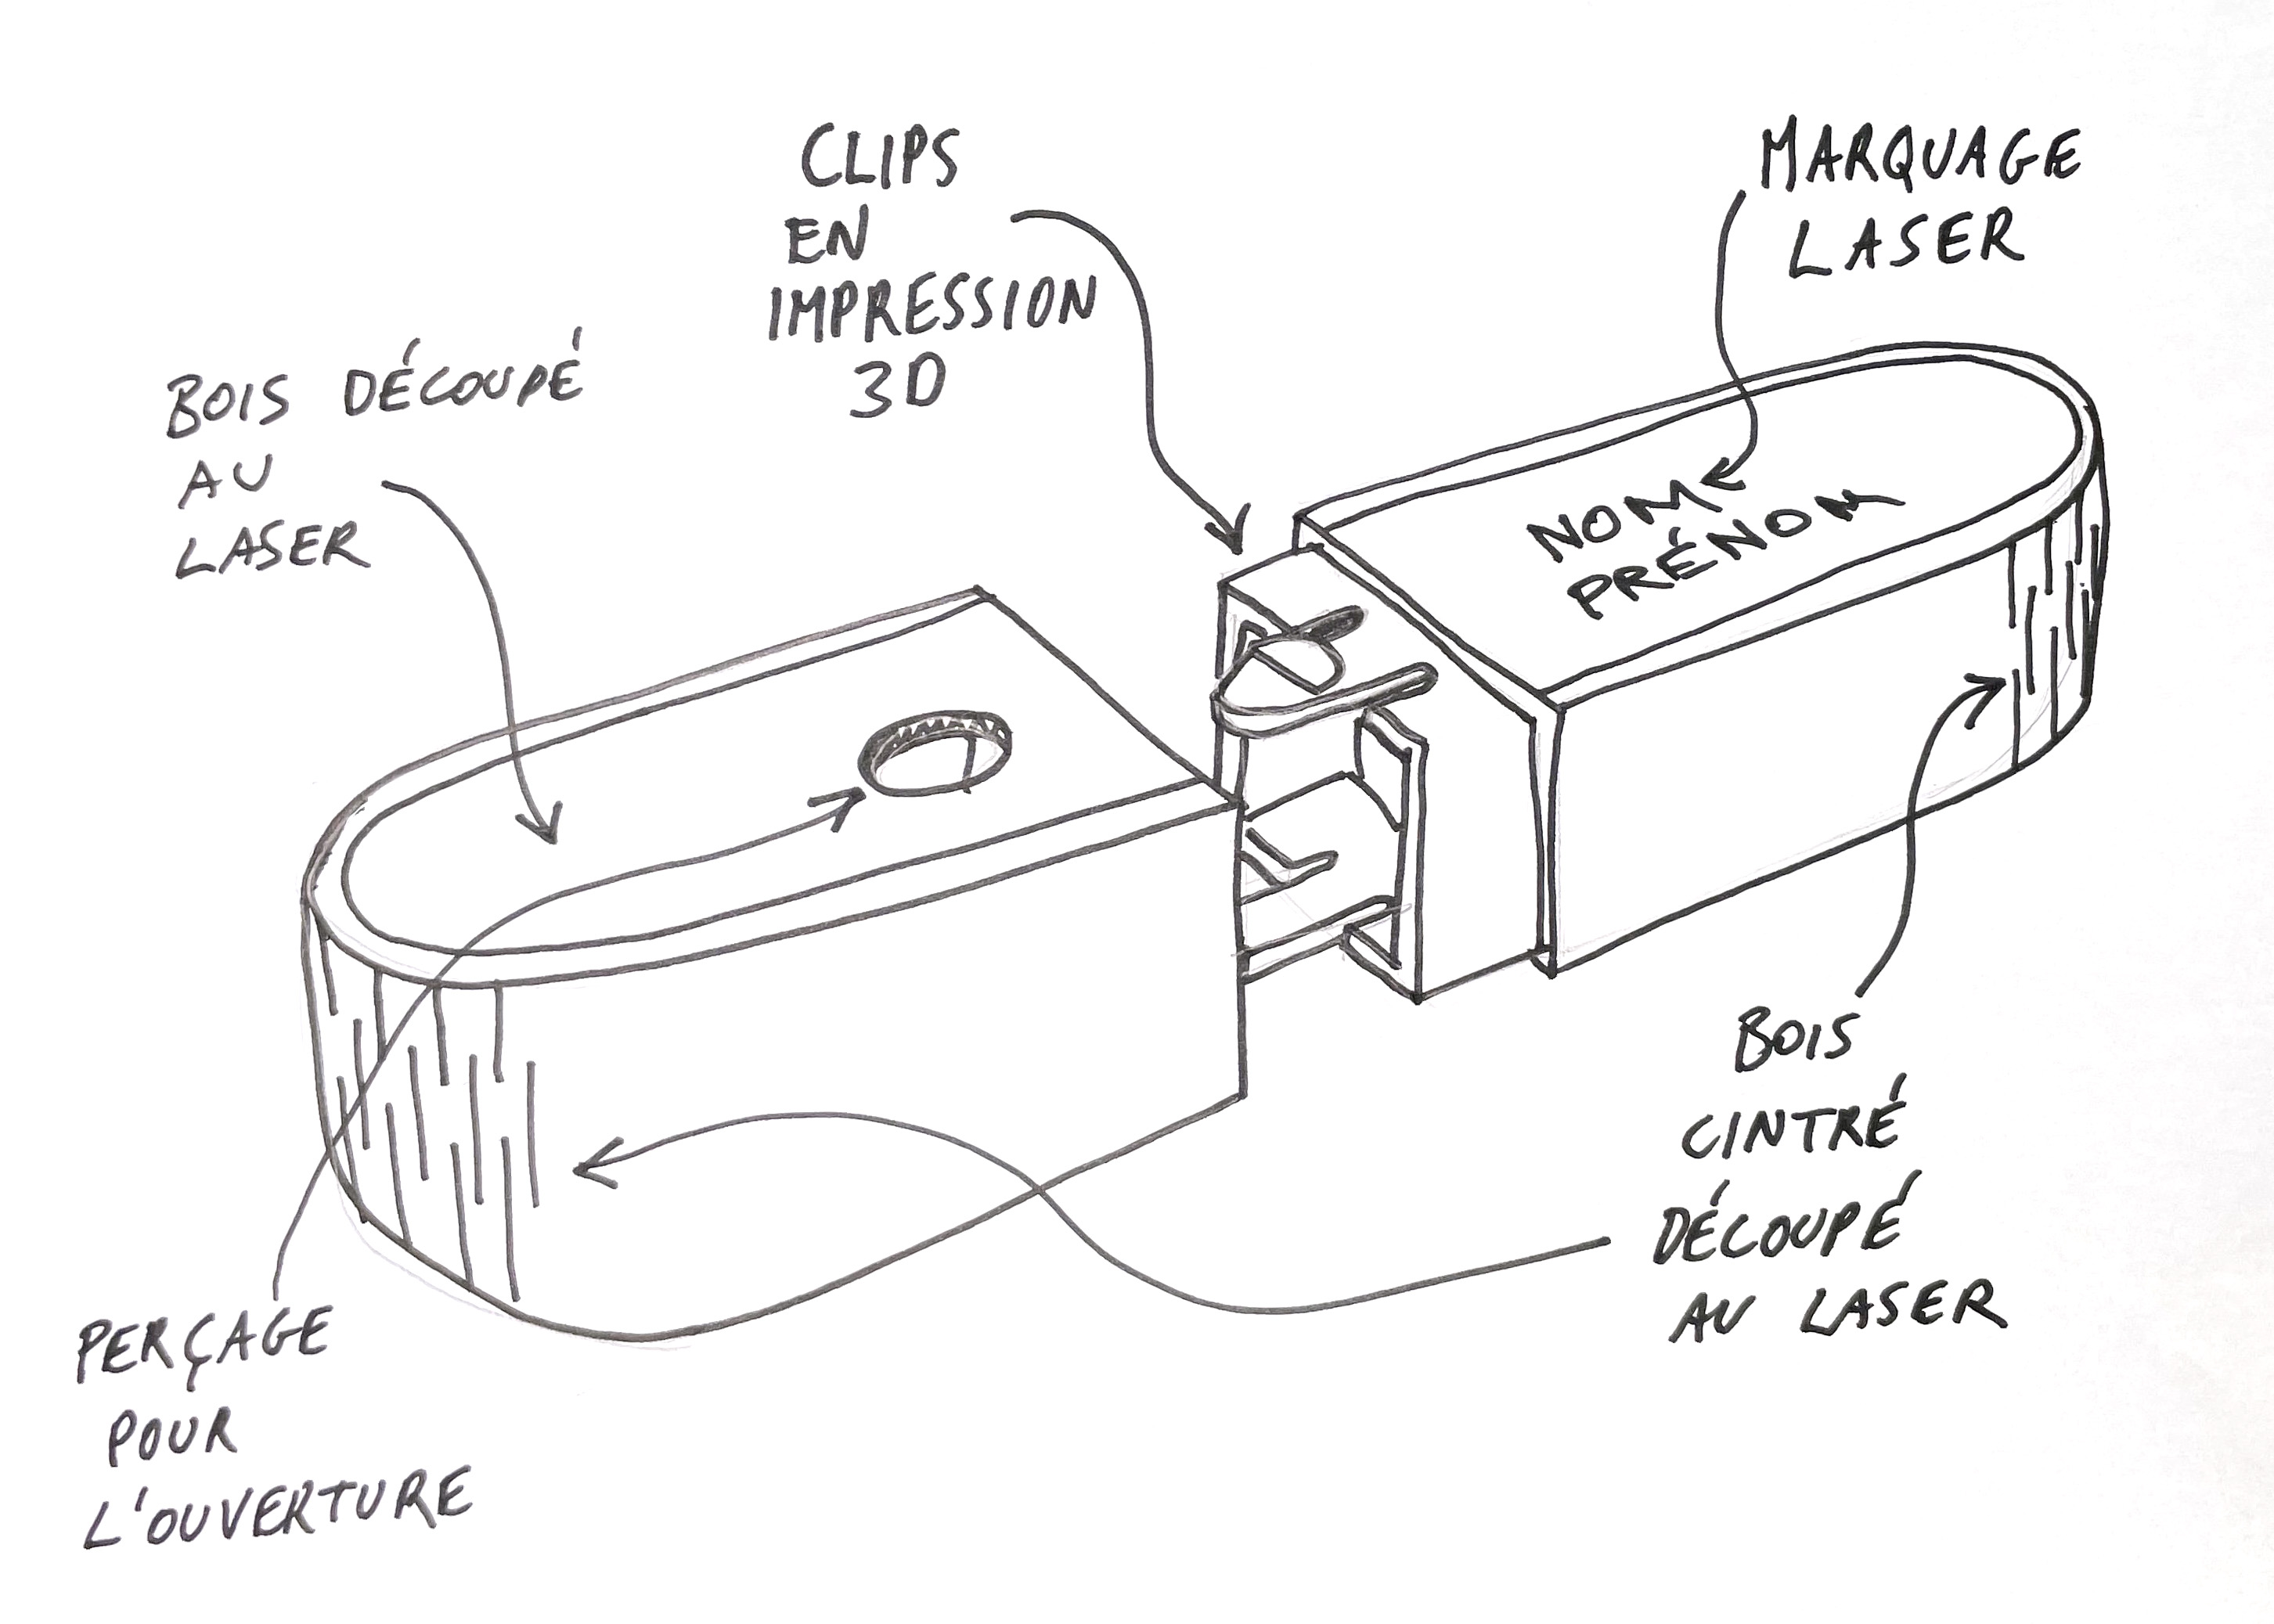
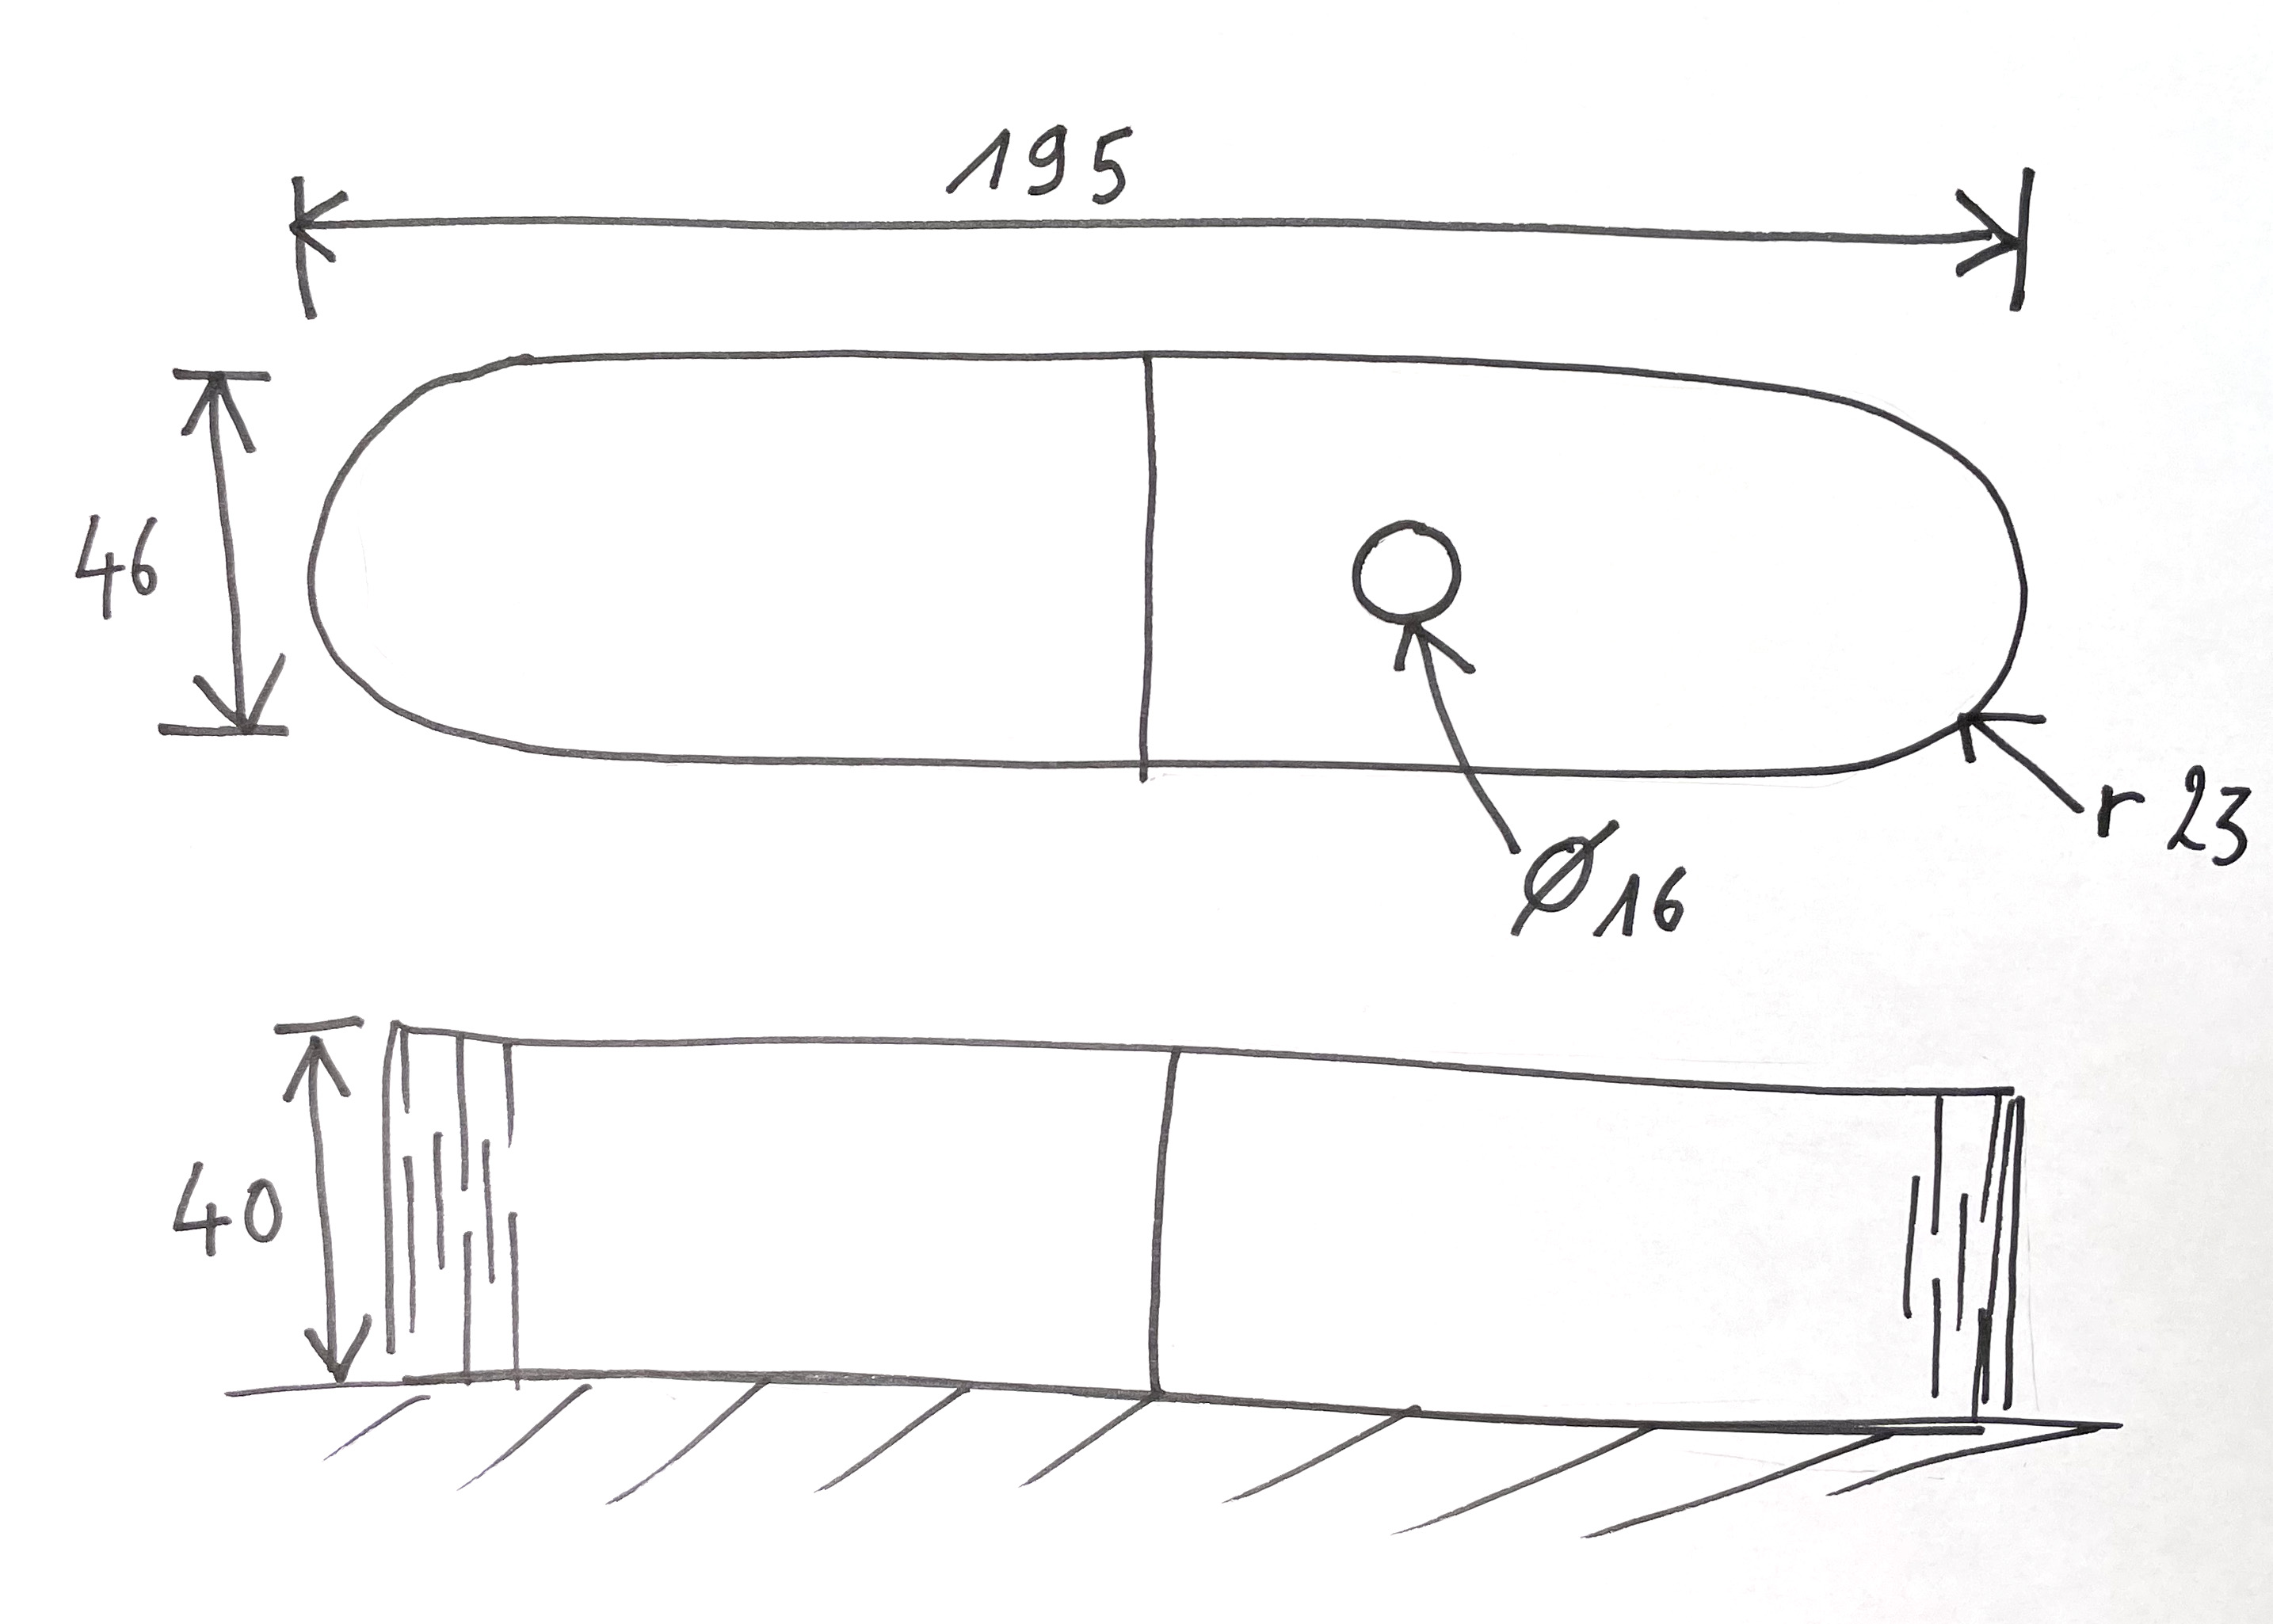
For example, let's detail the sketches of the cutlery case prototype example
No room to put all the information on the overview? Take a second sheet!
Do not forget to indicate the units (milimeter, centimeter, etc)
For some details that are difficult to represent in the global view or for moving parts that need to be manipulated in a certain way, it can be useful to add a small additional "thumbnail" to "zoom in" or describe the movement. 👇
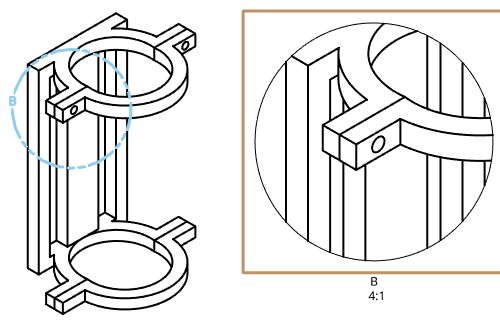
Source: Onshape
Measures
Use the ruler to measure the largest dimensions first, using your PoC as a reference, and then mark them on the drawing. Do the same for other dimensions: for example, the location of a button, the size of the screen, the thickness of a material, etc.
Be careful not to constrain the design too much! This means that each dimension should only appear once.
Annotations
Here is the information to add to complete your design:
- Name of the project
- Your name and frist name as it appears on BrightSpace.
- Name oh the views (top, bottom, left, right) and units (mm or cm)
- The date you completed or modified the design.
Documentation
It's not finished yet!
You must now add the drawings to your PoC documentation in the drawing section of your documentation on Notion.
Use our smartphone or a camera to take pictures of your drawings. Please note! The legibility of the pictures is part of the evaluation criteria.
Sum up:
- Your drawing should clearly represent the object by showing all the important elements.
- You must indicate at least the main dimensions.
- Provide information on materials, assembly processes or any other special features.
Don't worry if you don't get it right the first time! Even the best designers often have to go over and over again to find the right way to represent an object.
What's next?
We have represented our concept in the form of a drawing, we will now use this drawing to model and make the parts of our prototype in 2D on illustrator and laser cutting and in 3D on Tinkercad and 3D printers.
2D VS 3D
To define which parts of the prototype should be modeled and manufactured in 2D or 3D, here is a quick comparison of these two modeling and manufacturing methods:
Now that we have our drawings, it's time to make our prototype with the 2D design and 3D design modules!
