Additive Manufacturing
Prototyping with Fab
Reminder! It is mandatory to use at least one of the following 2 modules tfor your exploration:
- Additive Manufacturing (this module)
- Subtractive Manufacturing
Introduction
In the first part of the course we covered 3D design with Tinkercad and additive manufacturing with FDM 3D printing (hot wire deposition). In this module we will learn more about the so-called "additive"techniques (also called "adding material") and the possibilities they offer for prototyping.

This time you will not be asked to make an object with these techniques but to have enough understanding of them to explain how they are - or could be - used in a product or project that you have analyzed during your exploration.
As stated above you must choose only one of the two modules Additive Manufacturing or Subtractive manufacturing. However, feel free to take both if you want to master digital manufacturing even better!
Additive Manufacturing
Additive manufacturing is the other name for 3D printing. This term encompasses all techniques that allow for the manufacture of parts in volume by depositing material in successive layers. As for subtractive manufacturing, in this course we will only deal with numerically controlled techniques.
The production chain is similar for all additive manufacturing techniques: at the beginning there is the digital file of the 3D model of the part, this 3D model is sliced into strata (or layers) by a dedicated software called "slicer", for each stratum the slicer generates a machining path in the form of code that the machine will read to reproduce the part in volume. The main additive manufacturing techniques are:
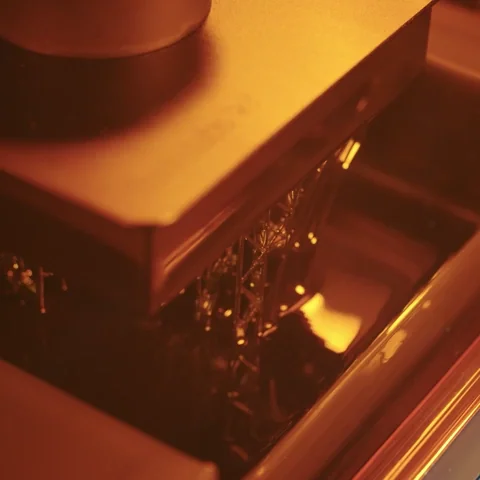
■ The Stereolithography (SLA):
it is the oldest 3D printing process, it was developed in the 1980s. The object is built from a bath of liquid photosensitive resin. Each layer is solidified on the surface of the bath with a laser.
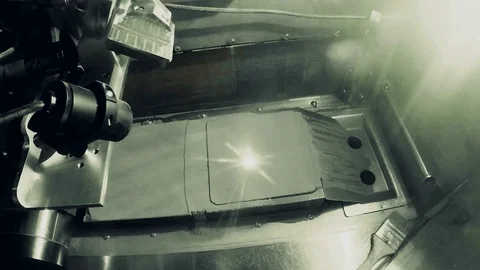
■ The selective laser sintering(SLS):
the object is constructed from a powder of materials solidified by the heat of a laser, this technique allows for the printing of parts made of nylon and metals like steel.
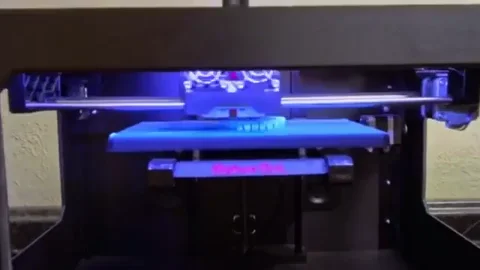
■ The fused deposition modeling (FDM):
this is the 3D printing technique we used in the first part of the course. To reproduce the part we use a filament of thermoplastic material that is heated to melt it, the melted filament is deposited layer by layer by a moving nozzle.
In the video below, you will discover the great possibilities that these different techniques offer for medicine, the production of functional parts, and even the space conquest!
If you'd like to learn even more about the various 3D printing techniques we invite you to check out the videos on Hubs, including this playlist.
Advantages and Disadvantages
Additive manufacturing and subtractive manufacturing are often used together because both types of manufacturing have their respective advantages and disadvantages, they are complementary
👍 The main advantages of additive manufacturing:
- It is possible to make very complex shapes.
- Generates less waste during production.
- It is possible to print several different materials at once
- Moving parts and mechanisms can be printed
- Allows for reduced prototyping costs and time
👎 The main disadvantages of additive manufacturing:
- Parts are sometimes fragile
- The surface condition is often rough or porous
- The printing time is often long.
- Deformations may occur during printing
- Not suitable for mass production
This article explains in more detail what the differences are between additive and subtractive manufacturing.
Designing for additive manufacturing
Because of its particularities indicated above, 3D printing offers a great freedom of design: thanks to it it is possible to manufacture forms that could not have been envisaged with "traditional" techniques. But for this, it is necessary to innovate when creating the design.
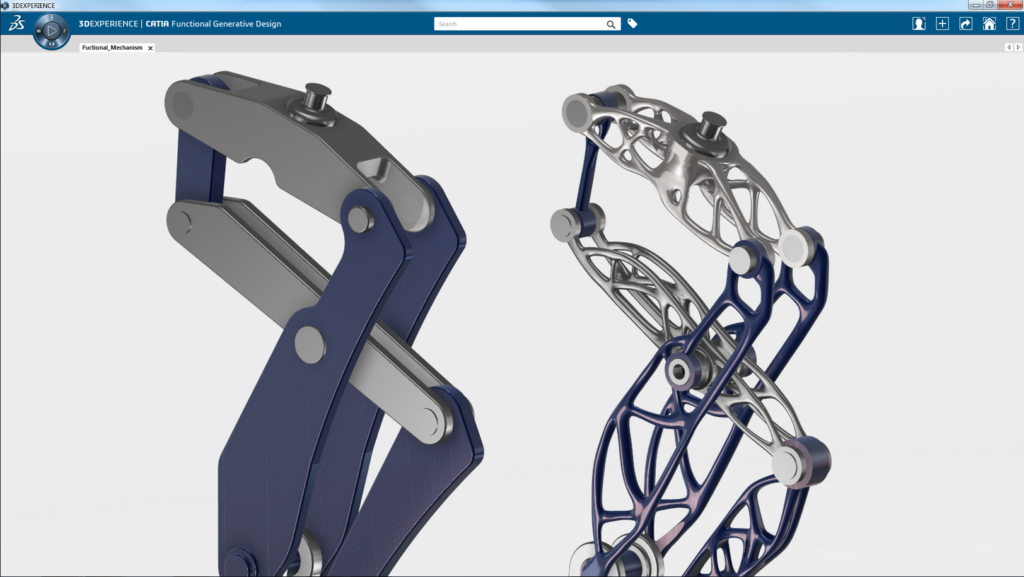
Generative design: technical optimization
The generative design is a new part design technique that uses the latest innovation in artificial intelligence. The designer of the part will tell the software a set of constraints (material, position and direction of forces etc.) and the algorithms will generate the optimal shape(s) that best meet these constraints. This method is not intended to replace the work of the designer or engineer, but rather to guide the design choices towards more efficient shapes.
The video above shows the optimization of a car part with the Fusion 360 software, the optimized part is 40% lighter and 20% stronger than the original part. If this principle were generalized to the entire vehicle the weight savings would be considerable and would consequently reduce fuel consumption while gaining speed.
A small talking example: In 2000 the American company Southwest Airlines saved more than $300,000 per year in fuel by removing 3 peanuts from its aperitif bags. Making vehicles lighter via 3D printing is a key solution in the race to save money and be more environmentally friendly because it allows for the production of hollow, lighter parts, while optimizing strength: a promise not possible with subtractive manufacturing or more traditional techniques.
Generative design and especially lattice structures are revolutionizing many fields where weight savings and porous structures have many benefits, such as medical or architecture.
Within and nTopology are other examples of professional software that can generate lattice structures.
Parametric Design & Mass Customization
In 2017, MINI offered customers a customizable car, the MINI Yours Customised. Customers could customize according to their taste and morphology certain parts of the car (steering wheel, lights, rims, etc.) online: these "unique" products were made automatically via 3D printing in particular. A feat possible thanks to parametric design: a way of designing parts that allows to change one or more of their attributes (size, density, colors, etc).
So it's a "Mass customization" that becomes possible: 3D printing makes it easier to create custom products.

3D scanning
3D scanning is another way to create 3D models. In the medical field, 3D scanners have already been widely used ( ultrasound, MRI, etc.) for a long time and allow the creation of custom prostheses for example. Geologists use it to make the topography of a place before various studies, the engineer to rely on the existing to complete or analyze it. There are several types of 3D scanners that use different technologies (laser, structured light, photogrammetry) depending on the application. A tool that is within everyone's reach: we all have a 3D scanner in our pocket since it is possible to use the technology of photogrammetry with applications like Qclone.
Coupling 3D printing and 3D scanning allows you to reproduce the existing, improve it, customize it or analyze it. It is also possible to scan an object and create a mold of it if making a print is difficult (fragile material, size too large, etc).

Materials for 3D Printing
With the makers' lab's FDM 3D printers, it's possible to print only in plastic (ABS in this case). But there are a multitude of printable materials and here are some examples:
-
Plastics:
- PLA, widely used in FDM 3D printing, made from corn starch.
- The ABS, as in the makers'lab, it is a plastic very common in industry, for Legos for example.
- PET, the plastic of bottles.
- PP
- Nylon, a very resistant plastic for making functional parts in FDM and powder (SLS)
- PVA, a water soluble plastic, allowing to create supports easy to remove after printing.
- HIPS, impact resistant and chemically soluble plastic
- TPU, flexible plastic that allows elastic parts (shoe soles for example).
- The photosensitive resins used for ALS
-
Metals:
- Aluminum
- Steel
- Cobalt-chrome, to create molds often
- Titanium, a very strong metal
-
Organic materials:
- Wax, in particular to create casts
- Food: chocolate, sugar, cheese, etc.
- Wood via hybrid filaments mixing plastic and wood
- Biological fabrics and inks by printing a gel in which cells are injected for example
Now it's your turn!
Now that we've seen the different possibilities offered by 3D printing follow the instructions given on the Exploration page and show how 3D printing is - or could be - used in the project of your choice.
As a reminder the project you have chosen must provide a solution to a problem related to your assigned topic in connection with the UN Sustainable Development Goals. To help you in your research we have listed sites where you can find projects, you can find this list at Resources.
If you haven't already done so start by duplicating the documentation template by following the instructions provided on page Exploration.