Subtractive Manufacturing
Prototyping with Fab
Reminder! It is mandatory to use at least one of the following 2 modules tfor your exploration:
- Additive Manufacturing
- Subtractive Manufacturing(this module)
Introduction
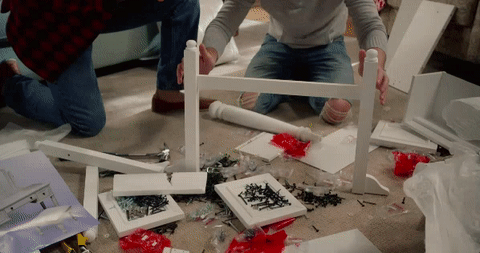
We learned about laser cutting in the first part of the course, we will now deepen our knowledge of this technique and see how to exploit maximum of the possibilities it offers for prototyping.
In this part you will not be asked to use laser cutting and 2D design to make an object on your own but to demonstrate that you have a sufficient understanding of them by documenting how they are - or could be - used in a object that you have selected and studied in your exploration.
As stated above you must choose only one of the two modules Additive Manufacturing or Subtractive manufacturing. However, feel free to take both if you want to master digital manufacturing even better!
What is subtractive manufacturing
Unlike 3D printing, which is an additive manufacturing technique, laser cutting is a subtractive manufacturing technique. There are many other subtractive manufacturing techniques: the milling, the waterjet cutting, the blade cutting, the turning... For all these subtractive techniques the part is obtained by removing material from a block or plate with a cutting tool. Machining can be manually controlled or numerically controlled by computer, in which case it is referred to as CNC machining (Ccontrolled Numerically Ccontrolled)
In this course we will only cover CNC machining.
The video below (in English) presents the basics of CNC machining and will allow you to better visualize how the different techniques we just listed work.
If you'd like to learn even more about CNC machining we invite you to check out the other videos on Hubs, including this playlist.
All industrial fields use subtractive manufacturing at some point in their production chain: for example, to cut body parts for the industrial sheet metal industry, to cut patterns in textile industry and packaging, for making furniture parts, or in core elements of architecture etc. In this module we won't go into more detail about these different applications but feel free to check out the resources page if you want to learn more.
At emlyon makers' labs the subtractive manufacturing technique we use is CO2 laser cutting. Many makerspaces and fablabs are equipped with this type of machine: makers love this manufacturing technique because it is without a doubt the fastest way to materialize their ideas with precision. Therefore, this technique is widely used by designers, architects, engineers and prototypists to quickly make all kinds of parts.
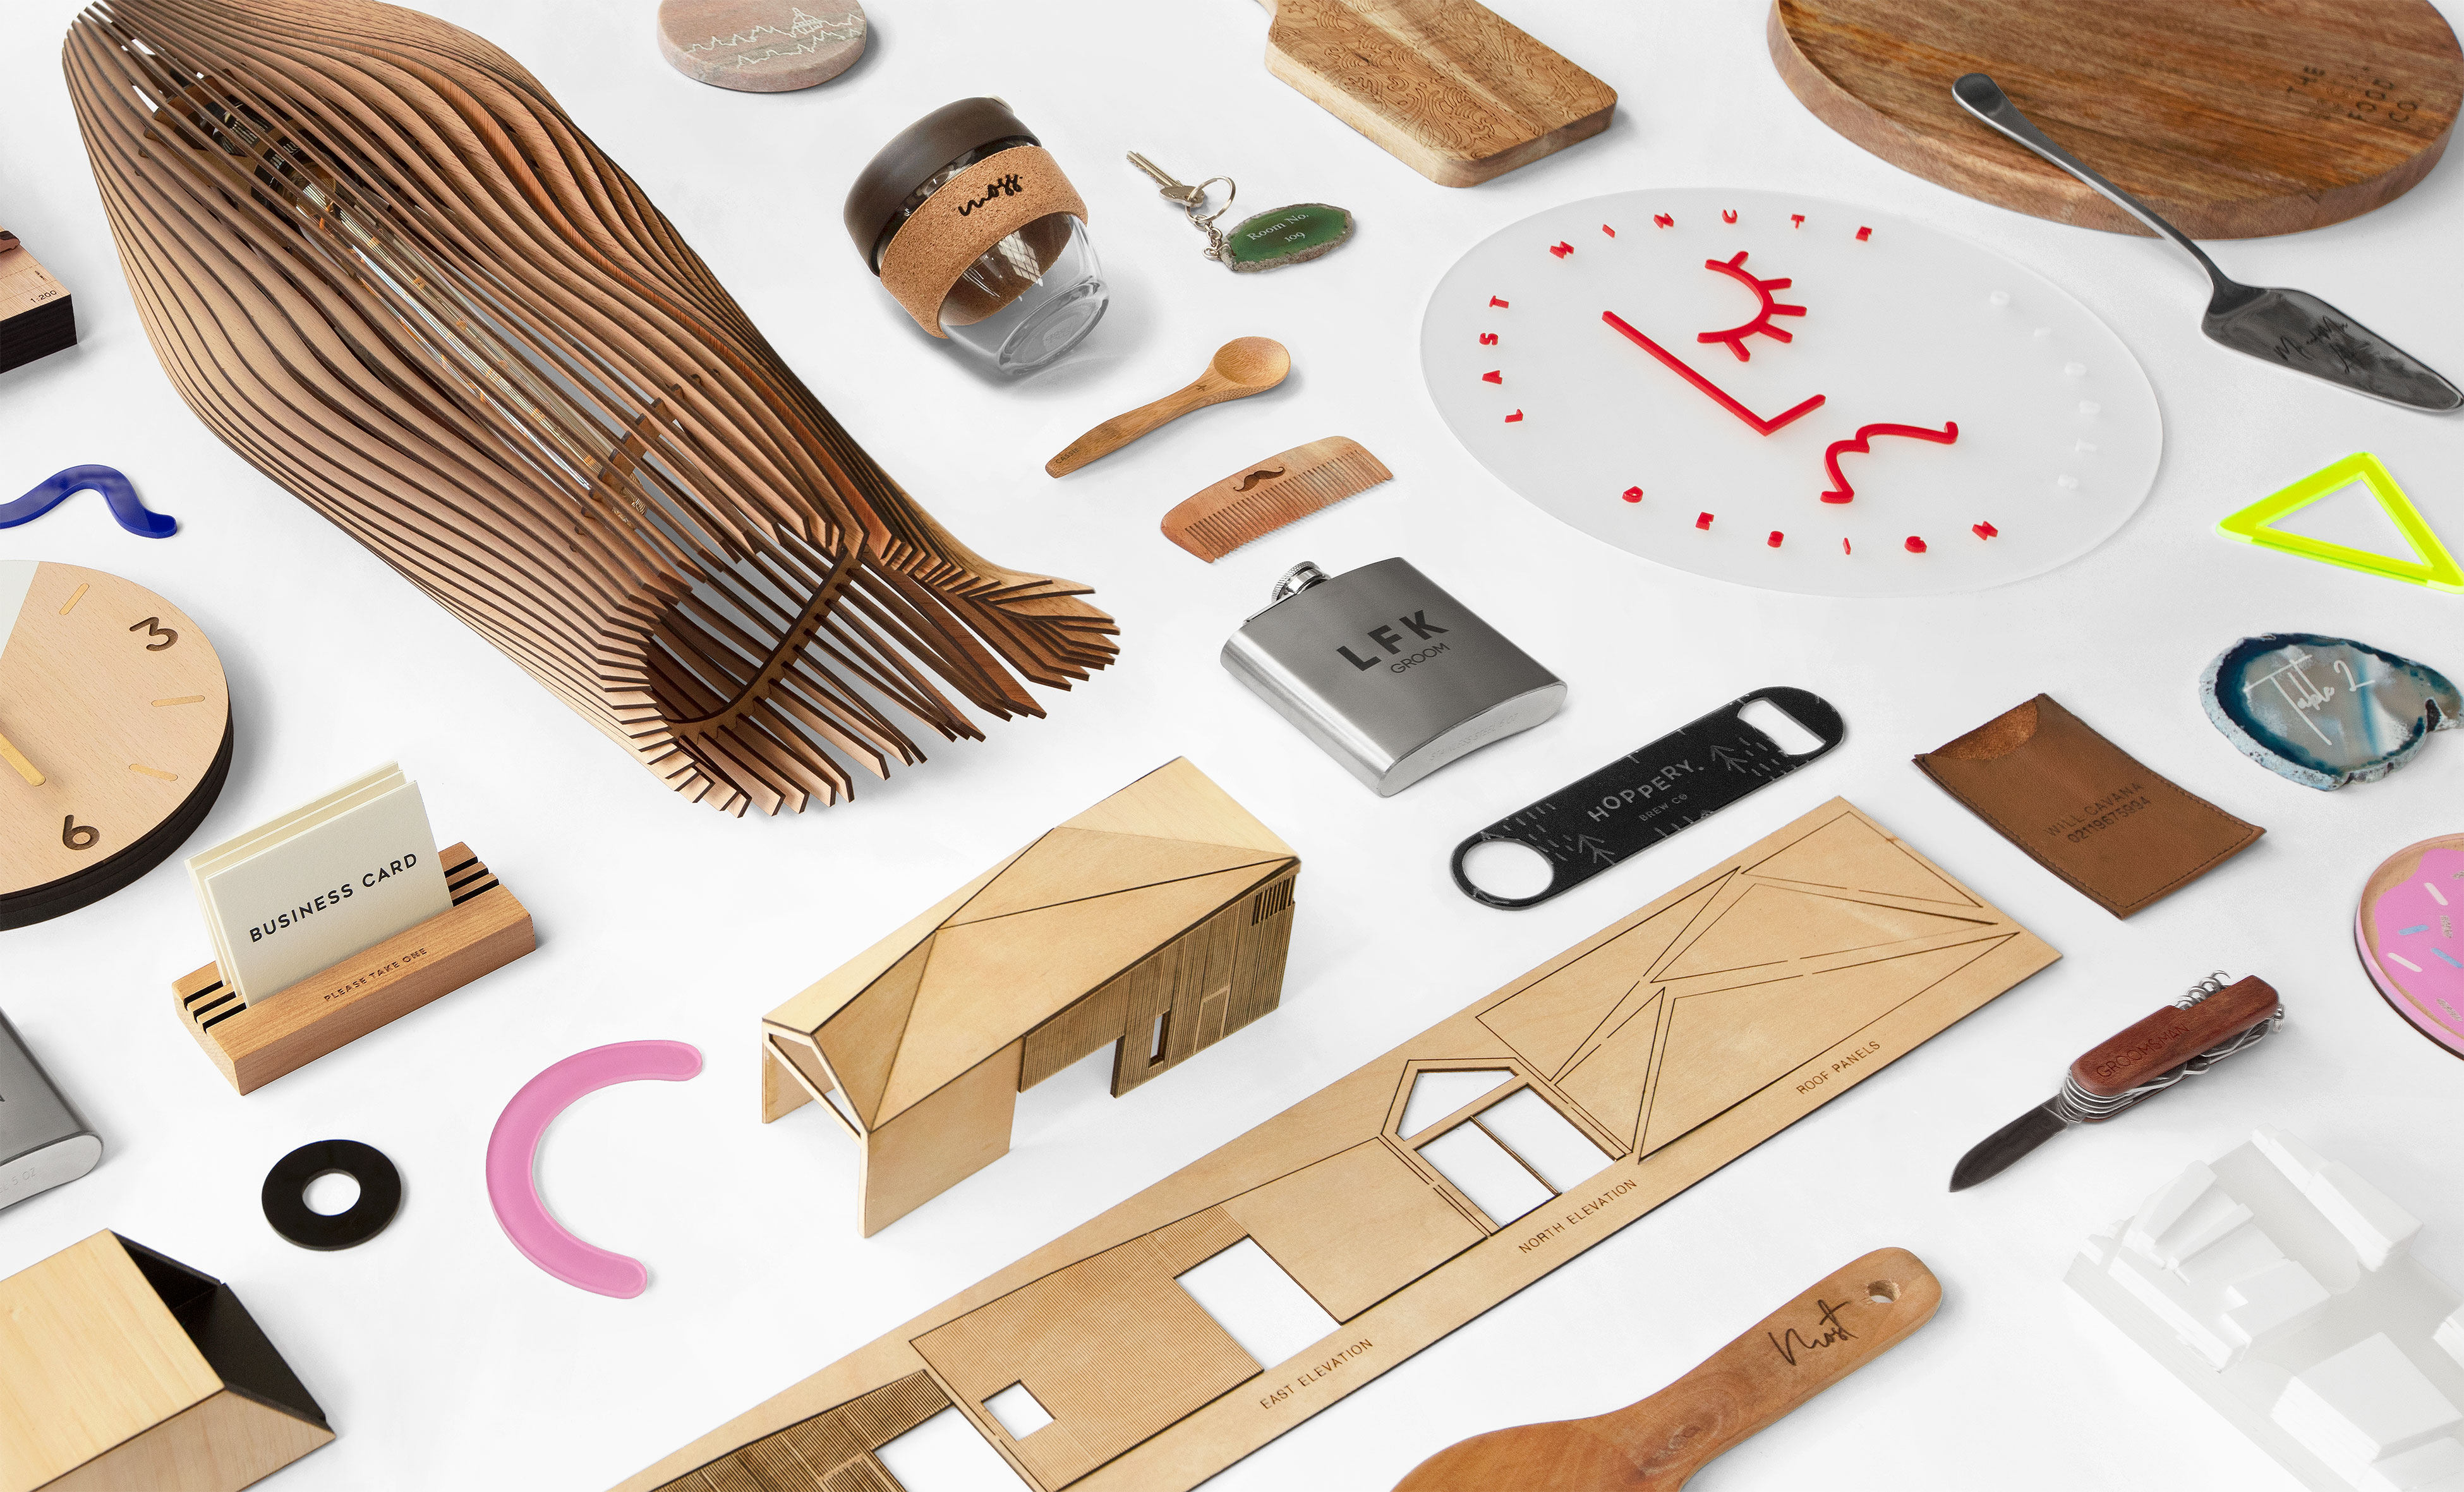
Source: Makeshop
Because of its speed this technique also allows several iterations of a prototype to be made in a very short time, for example by validating through testing a first version in an inexpensive material such as cardboard or paper before moving on to an improved version.
Source: Instructables
Advantages and Disadvantages
You may be wondering why both additive and subtractive manufacturing are used. Both types of manufacturing have their advantages and disadvantages and are often used together because they are complementary.
👍 The main advantages of laser cutting:
- Speed of execution.
- High precision.
- A cleaner surface finish.
👎 The main disadvantages of laser cutting:
- It generates a lot of material waste
- The preparation of the file can take time.
- Not all shapes are feasible.
Read this article to learn more about the differences between additive and subtractive manufacturing.
Laser cutting for object prototyping
Laser cutting can only produce flat parts (2D), for signage or marking this is not a problem but when you want to prototype an object you need to find solutions to create and assemble parts that will allow you to obtain volumes.
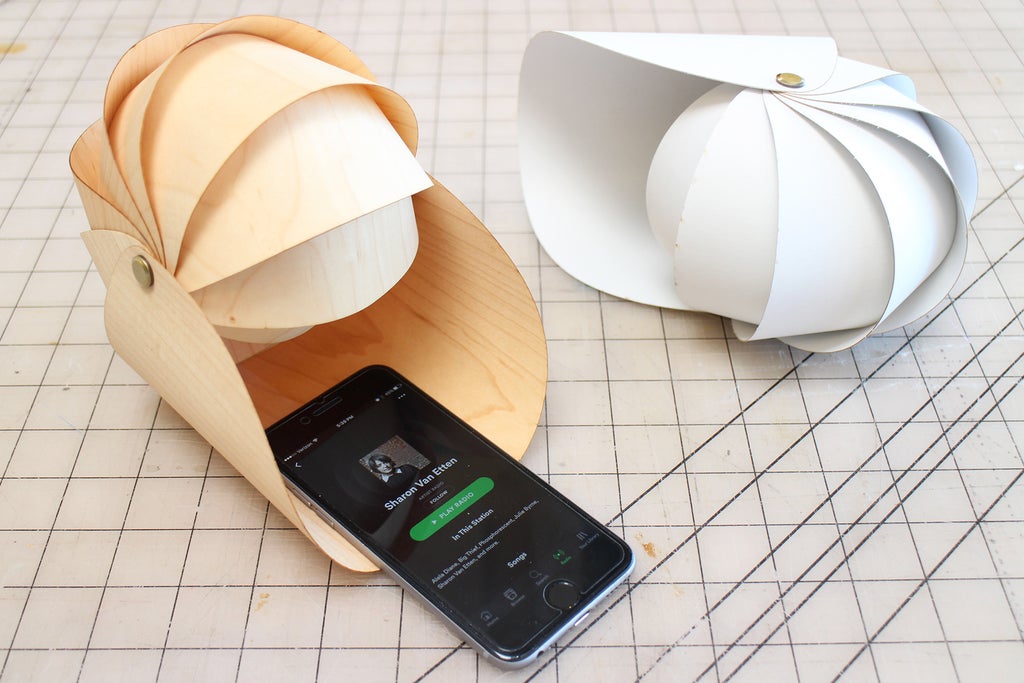
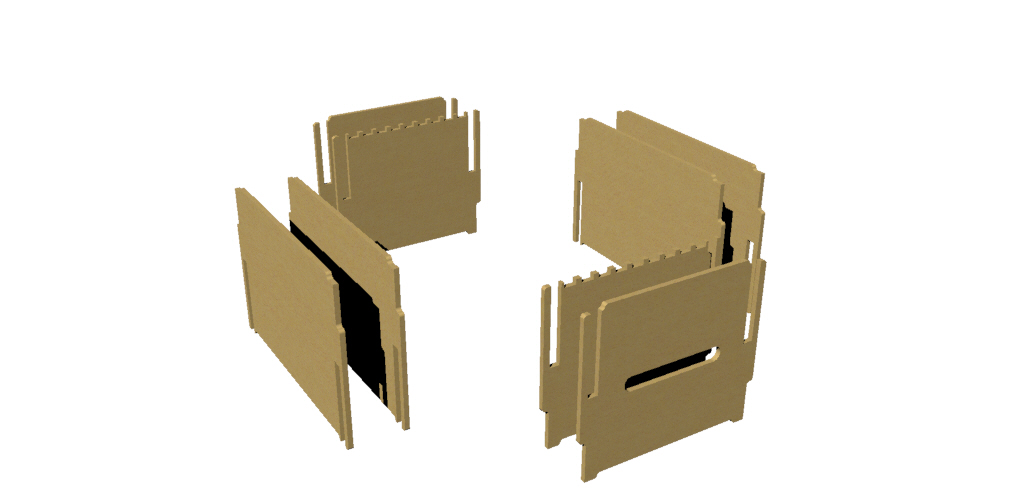
Kerf Bending
By making a series of cuts in the material (most often wood) it is possible to obtain enough flexibility to make curved shapes, this technique was used in the example of the cutlery case. to make the roundings. If you're interested in bending take a look at this tutorial on Instructables (in English).
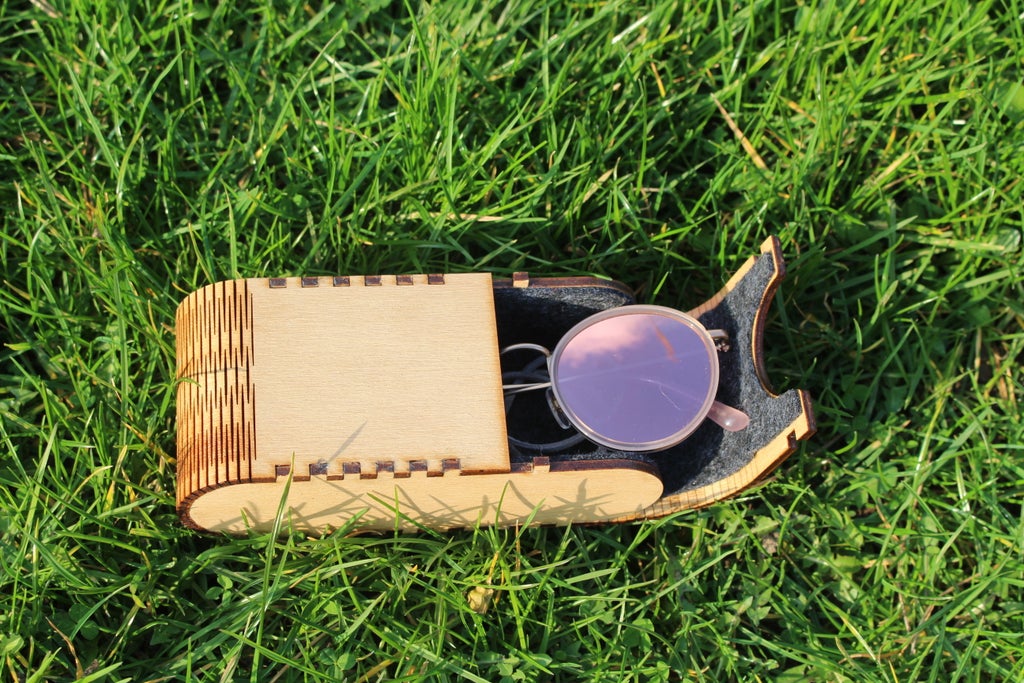
Source : Instructables
Shape generators
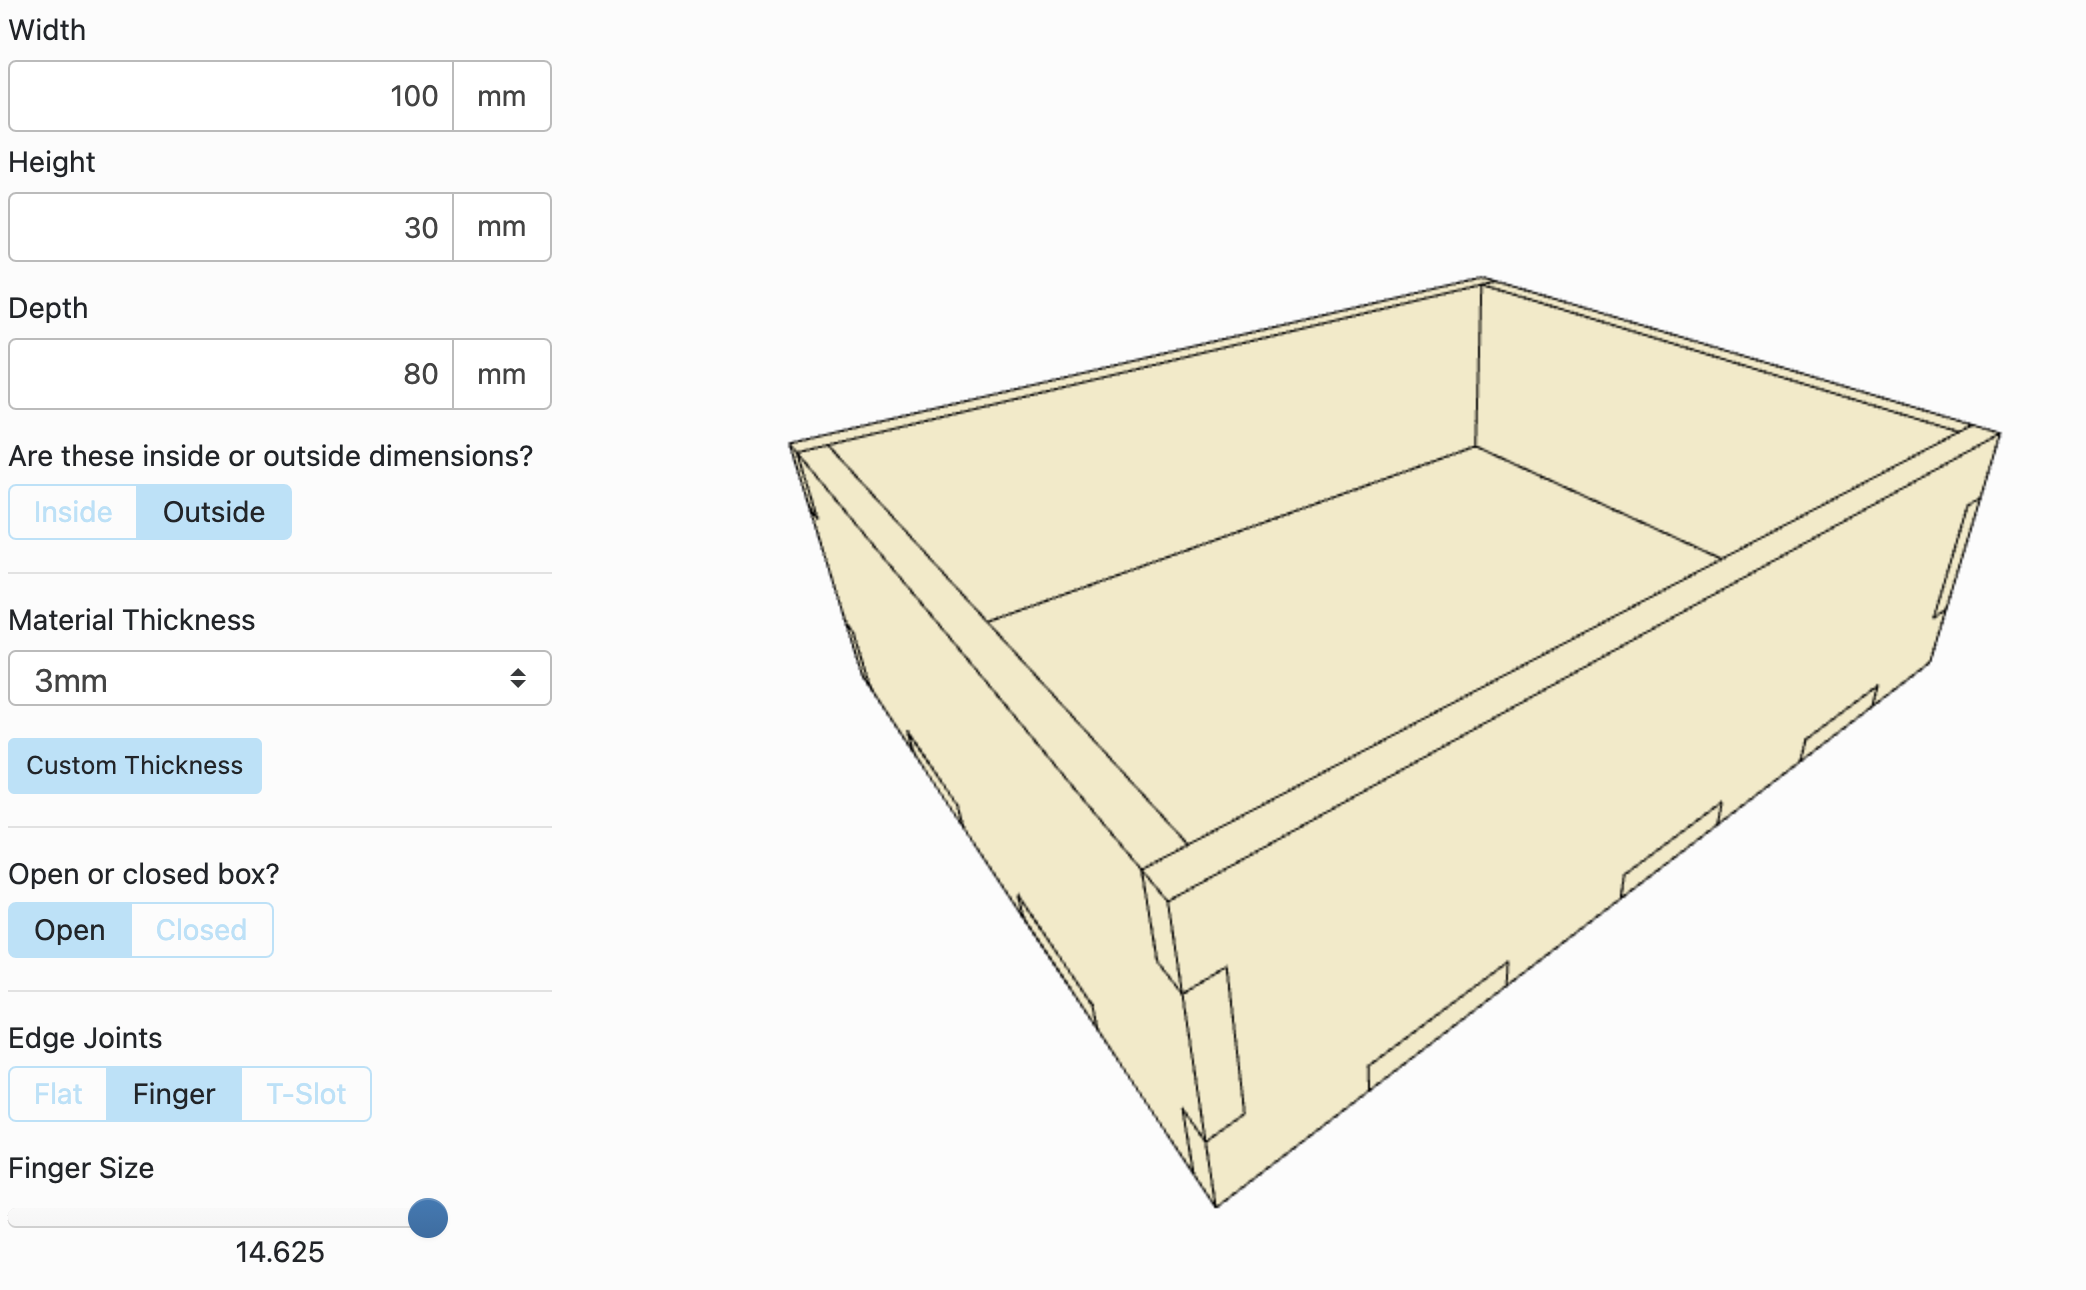
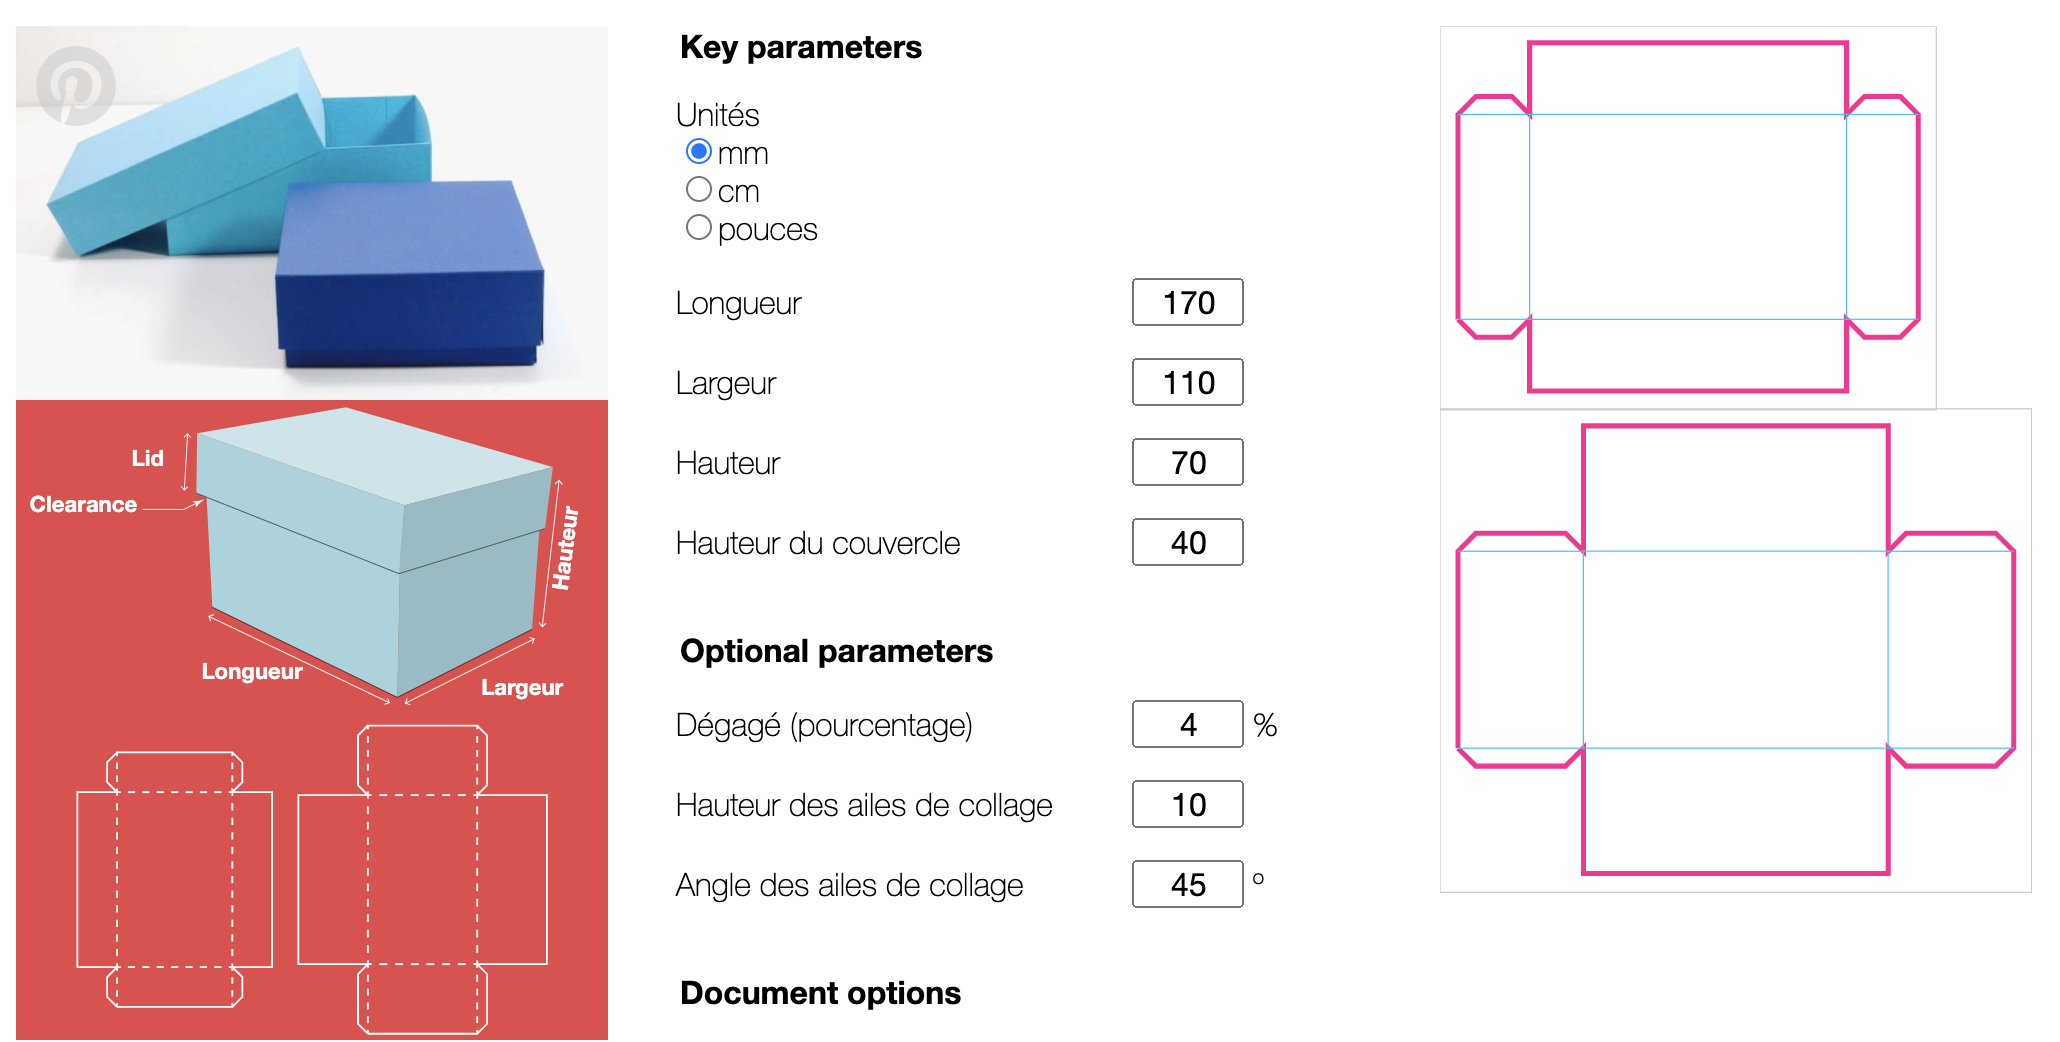
Designing part assemblies is often a tedious and complex task because you have to draw each element while having the final assembly in mind. Fortunately some makers have designed parametric design tools that automatically generate cutting files from user-defined parameters (dimensions, assemblies etc). For example the maker case and boxes.py sites make it easy to generate boxes and other simple volumes: just choose the dimensions, the thickness of the material used as well as the assembly type and the files are ready to be downloaded!
For assemblies of soft materials such as textiles or leather the web application Joinery allows you to create different types of assemblies from an existing 2D file. This tool is a bit complex, however the fairly detailed tutorial allows you to learn to use it quickly.
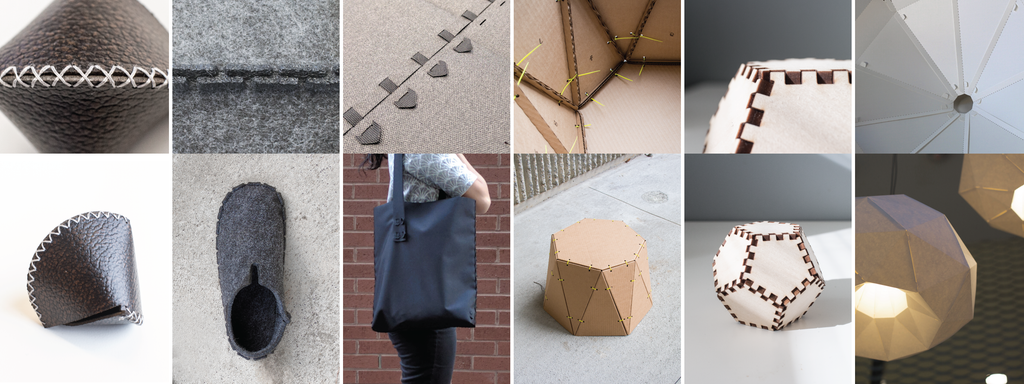
Source : Clement Zheng
There are also shape generators specific to packaging. For example, the Templatemaker site allows you to create various paper shapes from parametric templates: just choose your template and specify the dimensions and the file is ready to be downloaded, cut, folded and assembled.
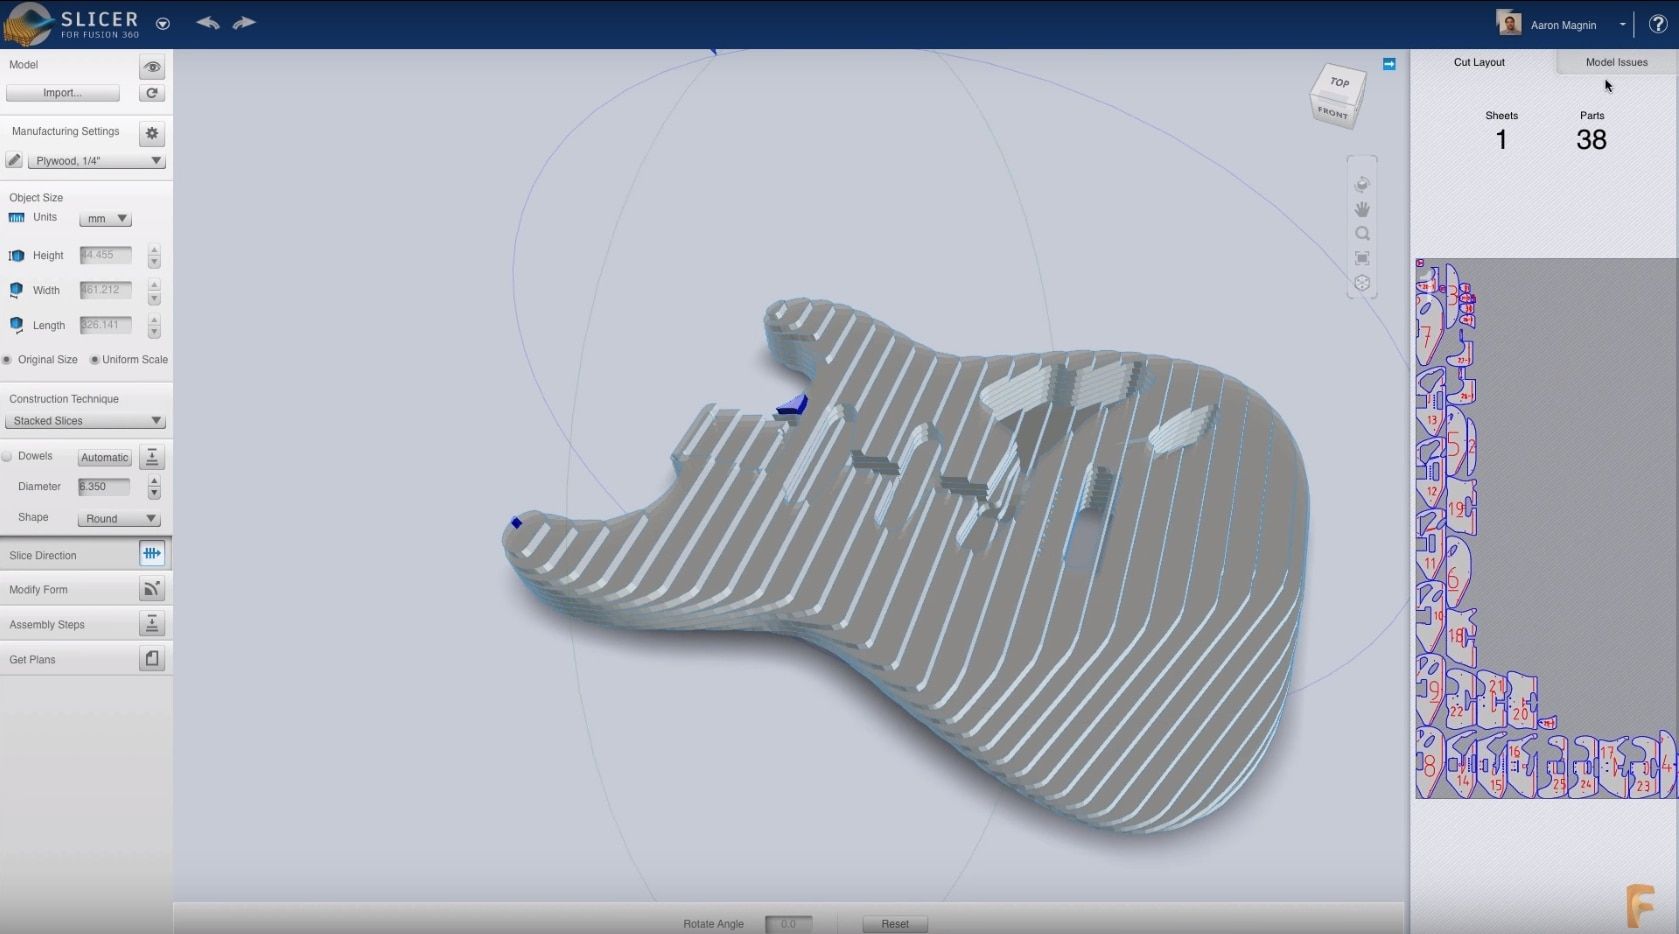
Making 3D volumes with Slicer
Slicer is a tool that allows you to recreate a 3D volume from 2D cutouts. The software can be downloaded for free from the Autodesk website and works with 3D files in .STL and .OBJ formats.
Source: Autodesk
The software offers different building strategies: stacking, axial or radial nesting etc. It also offers a visualization of the result and shows the steps to follow for assembling the parts. The video below gives a quick overview of how Slicer works.
Designing and cutting 2D patterns
With laser cutting it is possible to cut paper, cardboard and most textiles. Therefore, one can cut flat patterns that will then be folded and then glued or sewn to obtain the final object.
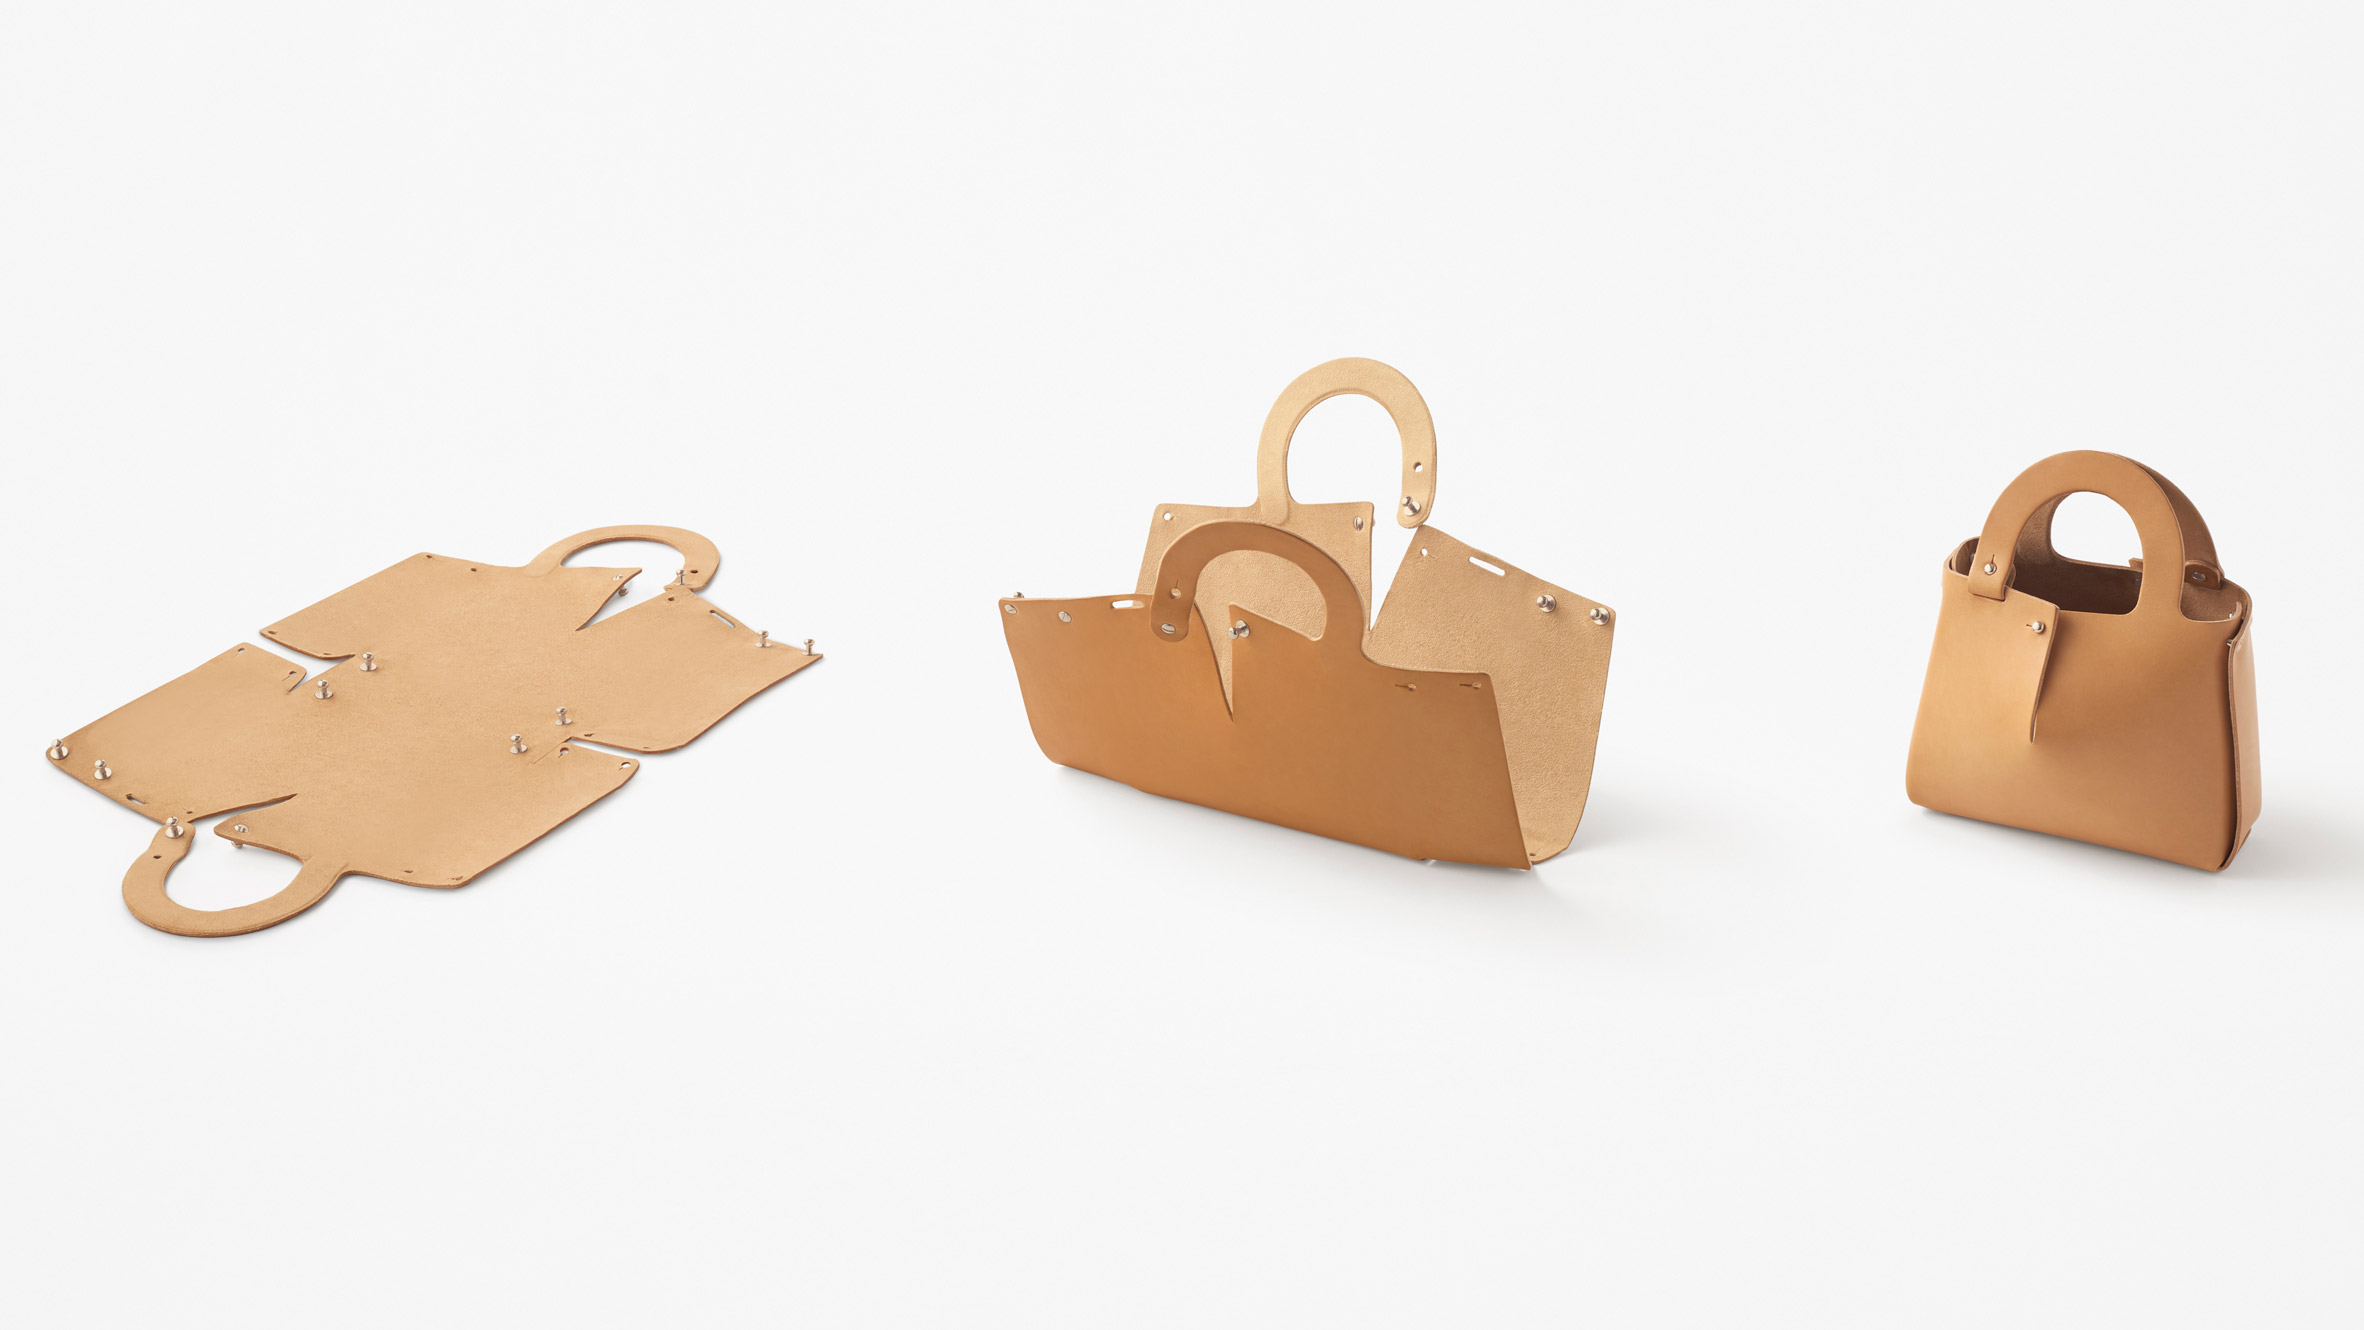
Source: Nendo
Designing cutting patterns is usually done with vector drawing software like Adobe Illustrator, which we used in the first part of the course. The following two videos show two use cases for this software.
🧋 Packaging creation:
Source: Zero2Graphic
🎒 Backpack design:
Source: Bag Buff
Getting stronger parts
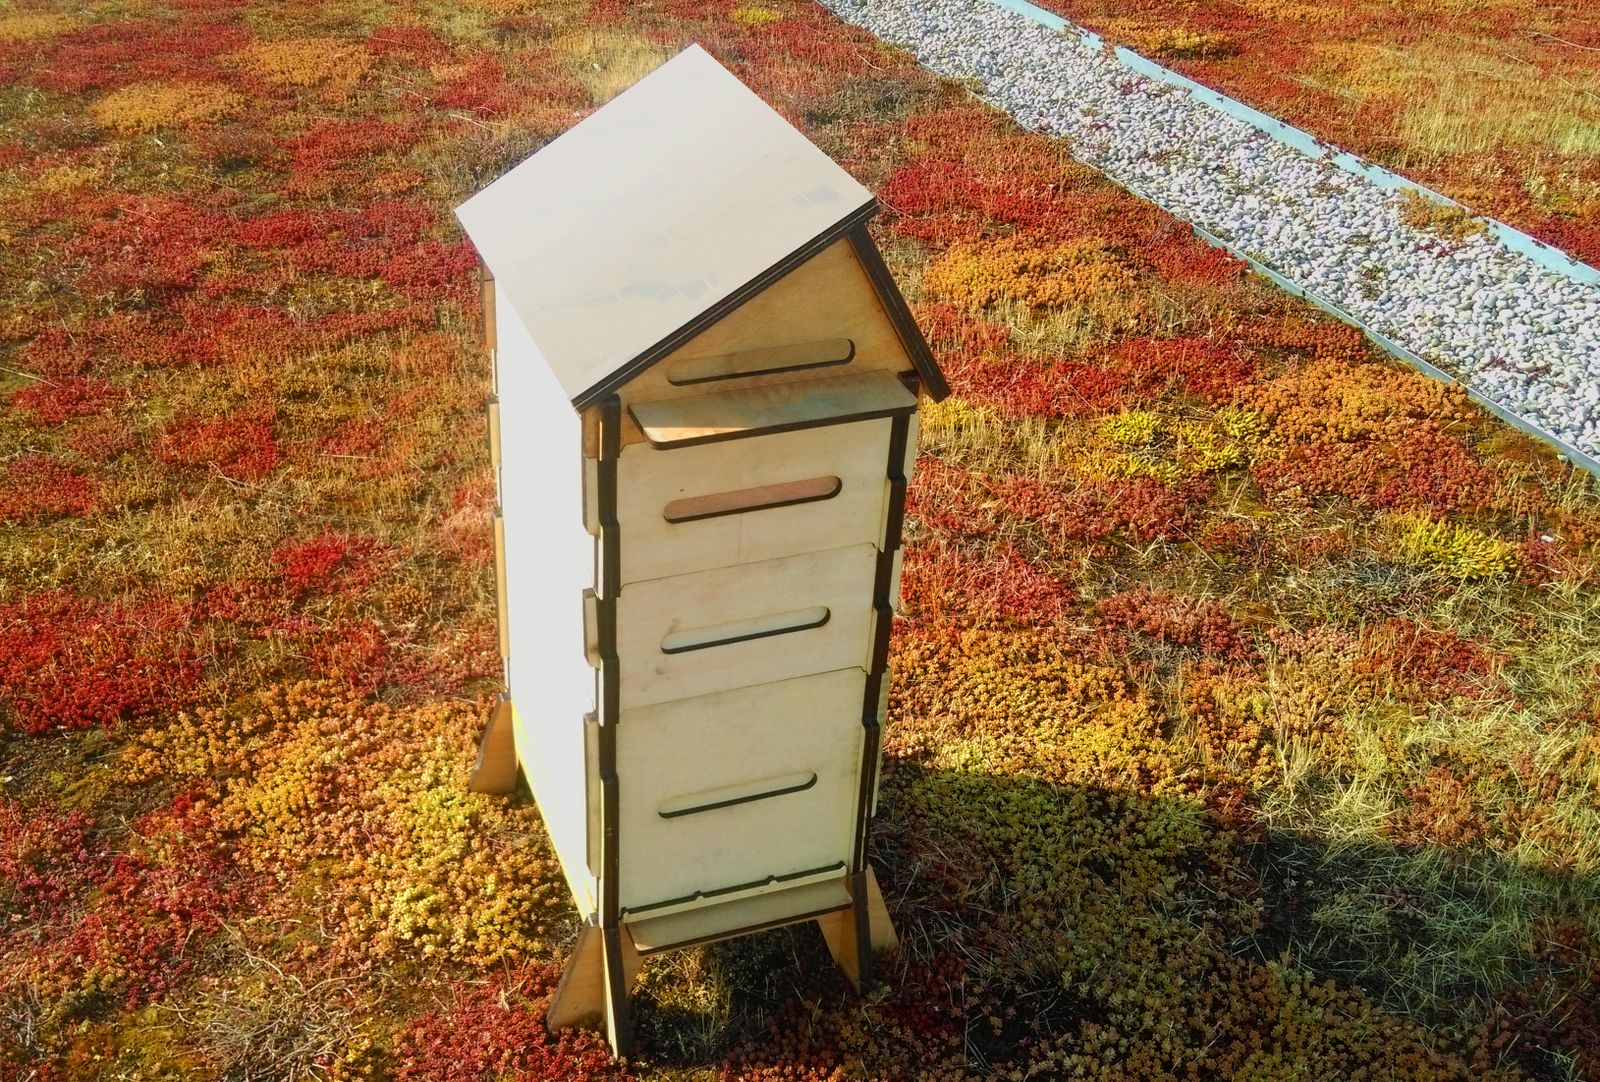
Makers' labs laser machines cannot cut thick materials (10mm maximum depending on the material). To get around this limitation it is possible to stack several layers of material to gain strength and provide more complex assemblies. It was with this technique that the first versions of the makers' lab's connected hives were produced.
Materials for laser cutting
With the makers' lab machine, it is possible to cut or engrave many materials: wood, certain types of plastic, fabrics, leather etc. However, metals and other very solid materials such as stone or ceramic cannot be machined with the makers' lab laser cutter.
Laser cutting of the materials listed below is strictly prohibited:
- Leather and artificial leather that contain chrome
- Carbon fiber (Carbon).
- Polyvinyl chloride (PVC).
- Polyvinyl butyral (PVB).
- Polytetrafluoroethylene (PTFE /Teflon).
- Beryllium oxide.
- Any material containing halogens (fluorine, chlorine, bromine, iodine and astatine).
- Epoxy or phenolic resins.
If you do not know the composition of a material you would like to use it is mandatory to ask permission from a maker's lab manager on your campus.
The CO2 laser machinable materials are detailed in this document (pdf file)
Now it's your turn!
Now that we've seen the different possibilities offered by laser cutting for prototyping follow the instructions given on the Exploration page and demonstrate how it is - or could be - used in the project of your choice.
As a reminder the project you have chosen must provide a solution to a problem related to your assigned topic related to the UN Sustainable Development Goals. To help you in your research we have listed sites where you can find projects, you can find this list at Resources.
If you haven't already done so start by duplicating the documentation template by following the instructions provided on page Exploration.